From the German 'Kabinettskriege' - Cabinet Wars: a period of limited conflict from the Peace of Westphalia (1648) to the French Revolution (1789).
Showing posts with label Maltot. Show all posts

Maltot - a Delaying Action (CoC)

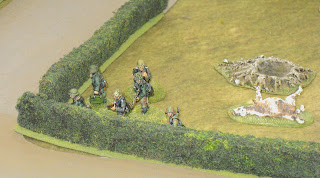
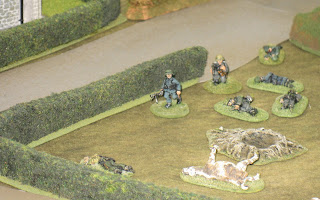
This was the 5th game in our Chain of Command campaign, with my much depleted 12 Platoon, 5th Wiltshires, pursuing John's equally depleted German platoon after breaking through their main defences in the previous game.  I'll apologise now for the lack of photos as again I got sucked into the game so didn't have many to choose from but have added a few posed, post-game, shots to try and make up for it.

So, how was 12 Platoon going to tackle this one?


Both sides had a starting Force Morale of 9 so diced for who went first - the Germans.  The patrol phase went as expected, with the German jump off points (JOPs) scattered across the objective area, and the British JOPs under cover in the derelict farm[1] complex and adjacent wood.


Once again, as the British, I rolled for, and got, the maximum level of support (10pt.s) and again opted for a Churchill Mk IV, a FOO with supporting 3" mortar battery (off-table) and a 3-man demolition team.  I would've liked to try something different i.e., two Churchills but I only have one model[2].  The 3-man demo team was just an attempt to provide a few more men for platoon which was had only one full section plus a second consisting of two LMG (Bren) teams.  All topped off with a 2-man 2" mortar team placed under the surplus junior leader (Jnr Ldr).

The Germans opted for the near obligatory adjutant and an SdKfz 250 carrying an elite four-man LMG Team.


For a long time the Germans sat tight keeping everything off-table, even when they rolled a double phase.  After throwing lots of 5's I got some better command dice and finally deployed my 'fire' section (2 Bren teams) out from the woods to occupy the 'shot-up house' as an initial covering position.

This was move was backed up by the Churchill entering up the road behind them.


Then, with these in place and on overwatch, the FOO deployed into the first floor of the derelict farmhouse.  In my next phase my 'manoeuvre section' (a full 10-man section) and 2" mortar team under a Jnr Ldr, deployed into the farmyard.


With still no response from the Germans and the 3" mortar laying smoke to cover them, the fire section left the shot-up house and advanced to the 'compressor building' which they entered and set up on overwatch (sorry no photos).  

The next phase the 3-man demo team deployed into the farmhouse with the FOO and with all pieces in place, there was no putting it off any longer so, the manoeuvre section took a deep breath and moved to the edge of the farm and prepared to advance across the open ground.


This bold move (foolishly not even moving tactically) stirred the Germans into action, playing a CoC dice to spring an LMG ambush...


...  on my manoeuvre section, the consequences of which were truly appalling, 3 dead including the Jnr Ldr, but no shock - a theme that was to run for some time in this game.


The ambush party immediately withdrew after this opening burst of fire.  This felt like a body blow, and partly my fault as, I had been so obsessed with risk of ambush against my Churchill, I had failed to consider one being sprung against my infantry.  I had thought they were safe as the Germans couldn't deploy into a fire position against them but ambushes can be deployed further out from a JOP.

In the following phase the Germans doubled down and deployed one of their depleted sections (reduced to a Jnr Ldr and LMG team) to apply pressure to my fire section in the compressor.  Annoyingly, I had set up both my Bren teams on overwatch facing the same, wrong, direction, so they were able to move into position in the 'orchard' without being fired on.

In reply, all I was able to do with my stranded manoeuvre section, was to move up my platoon commander (left behind by mistake) to a position where he could at least get the section moving - tactically this time. 


At the same time my FOO contacted the off-table mortar battery, and the platoon sergeant rearranged the fire section in the compressor house to engage the LMG team in the orchard.  Despite only one Bren being able to fire at reduced effect, having moved, a kill was scored. 


The Germans then deployed another Jnr Ldr and LMG team to the 'tractor shed' and, together with the other team in the orchard, both opened fire killing two of my men in compressor house. 

In my next phase, and panicking slightly, I called in an immediate barrage, without a preliminary ranging shot.  Annoyingly, I did this before my Bren teams in the compressor house returned fired thus missing an opportunity to inflict further casualties on the German LMG teams before the barrage came down.  Even worse, the barrage didn't come exactly where requested and hit the compressor house as well as the German LMG teams!  Everyone in hard cover came out of this scot-free, but the German LMG team in the orchard lost another man killed; the seventh fatality in the game and still not a single point of shock inflicted on either side!

My platoon commander also caught up with the manoeuvre section and advanced them up to the 'stone station'; covered on one side by the barrage and on the other by smoke and the Churchill which had moved across for this purpose.


John seemed paralysed by this turn of events and did nothing in his phase other than bemoan a lack of a command die to bring on his SdKfz 250.  Was he really giving up, or did he have a cunning plan?  Taking advantage of the absence of any German counter, my manoeuvre section, covered by some well-placed smoke, advanced up to the stone station without further mishap.


Just as I was feeling things were well back on track, John used a CoC dice that got rid of all my smoke and overwatch, but not the barrage as I responded with a CoC die to keep that going.  Thanks to lots of 5's in the early phases I still had a couple of CoC dice more than John, who had used one for the ambush, and I had been deliberately hoarding them for the express purpose of maintaining the mortar barrage when called in.  But, with the smoke gone, John deployed his Panzerschreck team!


They let fly at my Churchill and missed!  But then in my phase so did everything I could fire at them!

John's following phase was unsurprisingly a repeat performance, the Panzerschreck crew took careful aim...


...and, scratch one Churchill!


Things were looking a bit more in doubt, but both my sections were safely in hard cover.  On reflecting further, I realised that my manoeuvre platoon could've ignored the stone station and advanced further to close down two of the German JOPs while their third was still in the middle of my mortar barrage.  This would've wrapped up the game.

However, for John things were still looking grim, my barrage was still coming down and as I had a handful of CoC dice there was little chance of it stopping any time soon.  So, with the realisation that the barrage would be moving soon John deployed his elite LMG crew in the SdKfz 250.


Over the next few phases these tried to get at my manoeuvre section in the stone station but were driven off by machinegun fire (special rule for machineguns firing at vehicles).  Also, by this time the German Jnr Ldr and LMG team in the orchard had paid the ultimate price for getting stonked by mortars in an orchard.


With this threat eliminated, my barrage was now adjusted to cover the 'station row cottages' and 'stone cottage' pinning everything except John's SdKfz 250 that had been forced to retreat back to his table edge and the weakened LMG team in the tractor shed.  


Realising there was no escape from the overwhelming mortar barrage John called it a day and voluntarily withdrew before he lost everything.  But, with many of his men now pinned by a mortar barrage they had to roll a D6 to see which managed to escape to fight another day.  In a shockingly bad spate of die rolls, of those figures that were pinned:
2 got away unhindered
5 (including a Jnr Ldr) were dispersed (missing the next game); and,
4 were captured, including the senior leader (Snr Ldr) seen here emerging from the outhouse in which he had been sheltering (hiding?) from the barrage.


Overall, the losses suffered in this game were:

British: Jnr Ldr and 4 men killed or wounded.
German:Jnr Ldr and 6 men killed or wounded; 1 Snr Ldr and three men captured; and, 1 Jnr Ldr and 4 men missing (dispersed to return after the next game).

After calculating those battle casualties that could be patched up and returned to duty (RTD) the respective strength of the two platoons was now:

British: 2 Snr Ldrs, 2 Jnr Ldrs and 12-13[3] men.
German: 1 Jnr Ldr and 5-6[3] men.
             (plus 1 Jnr Ldr and 4 men RTD after the next game). 

It would seem that both platoons have fought each other to a standstill.


It is now a racing certainty that, the British will swap out 12 Platoon to be replaced by the full-strength 16 Platoon and, the Germans will call for reinforcements which at this stage of the campaign would consist of 9 + D6 replacements so, a total of 10-15 elite Panzer Grenadiers!

As yet no date has been fixed for Game 6.


Notes.

[1.] The building names are those of the Hornby Skaledale models used, with the exception of the 'Shot-up House' which Hornby entitled 'Derelict House'.

[2.] Note to self: I must make up my other Churchill kit!

[3.] In the campaign, the British only recove a quarter of the most lightly wounded i.e., those that would normally return to duty in time for the next game.  We have diced for farctions during this campaign.  Also, if the Germans lose the fourth scenario (this one), they lose their aid station and suffer from the same limitation on casualty recovery.  Both the British and Germans would normally have got one casualty back immediately so they both have a 1-in-4 chance of getting a man back for the next game.

CoC Maltot Campaign - Game 4

John came round today for the next round in our Chain of Command learning campaign - the push by my platoon from the 5th Wiltshires to take the Normandy village of Maltot in 1944.  The previous 3 games are covered in an earlier post.

Both our platoons were now seriously understrength (approximately one full section and others reduced to LMG teams).  Despite this, we both elected to press on, saving our one-off reinforcement option for another day.  

This scenario saw the British attacking the main defence position of the Germans and was more built up than previous games - providing good defensive positions but also some covered approached for the British.  The patrol phase saw the German jump off points (JOPs) clustered in three buildings in one corner of the table facing the large farm building holding one of the British JOPs (see below)


The Germans chose fairly passive support options, 2 minefields and 2 barbed wire entanglements, which can be seen in the above photo; their last support point being spent on an adjutant to chivvy their troops onto the table.  

The British (having a starting morale of 9 versus the German 8) took the first move and immediately established a strong firebase with a section of two Bren (LMG) sections placed on overwatch upstairs in the large house.  Their best section (only one man short of establishment) entered from a JOP placed further back together with the 2" mortar (once again placed under the control a redundant section leader).  The photo shows these troops arriving and the location of the other two British JOPs (white stars).


The Germans responded by deploying a section (really just a reinforced MG42 team) into the house with a grey tile roof adjacent to the road running through the middle of the table.  In following British phase I deployed my key support elements, a Churchill Mk IV, and a forward observer (FO) for an off-table 3" mortar battery, with my platoon sergeant, into the large farmhouse.

This seemed to spook the Germans into deploying another section into the same house (one upstairs and one downstairs). 

In the next British phase, while the FO established contact with the 3" mortar battery, the Churchill edged forward and put a round into the house holding the two German sections (to no effect) and the British section, who had been joined by the platoon leader, advanced further as though 'left flanking'.  The 2" mortar also placed some smoke in front of the German occupied house.

To counter the nascent flanking move the Germans sent one of their 'sections' across the road, through the British Smoke, to occupy the white house (with the badly shot up render).  At the same time their senior platoon leader deployed behind the smallest building holding a German JOP, why I don't know.


This early deployment by the Germans, probably an overreaction to their experience deploying after a pre-game barrage in the previous games, was to prove their undoing.  But not until after they had a triple phase that saw their MG42 team taking cover behind the wrecked lorry to fire at my advancing section.  However, in a breathtaking series of unlucky dice throws, all three rounds of German firing only inflicted 2 shock on my section. 

In my next phase the British flanking platoon decided not push their luck and pulled back behind the barn. This allowed the FO to call in a barrage from their 3" mortar battery.  The FO dispensed with an aiming shot, calling in an immediate barrage which luckily landed on target first time!  The outer edges of the barrage, which extends off table beyond the German baseline, are marked by lengths of smoke in the photo below. 


This barrage pinned the German section in the JOP house next to the road and also just caught, and pinned, their platoon leader behind the derelict outhouse.


 The barrage was to prove frustratingly ineffective in terms of killing anyone, but left the Germans in a really sticky situation with the only section not pinned by the barrage stuck in the road.  It couldn't go back because of the barrage and entering the house would see it subjected to fire from the Churchill to which it could not reply.

The action then slowed to a steady drumbeat of tank fire and mortar rounds with the Germans hunkering down (mostly in hard cover) and hoping to win the battle of the CoC dice.  Eventually, they did win, courtesy of a double, and then a triple phase, including an end of turn (three 6's).  This left me out of CoC dice to keep my barrage going when he used his third(!) CoC dice to end it.  As soon as the barrage ended, the German platoon leader, again for reasons I couldn't fathom, fled to the table edge furthest from my troops - he can be seen in the foreground of the image below, cowering behind a hedge.


My FO's attempt to request another barrage, first met with a response to 'try again later' and then, later, with a blunt refusal to provide any more fire support during this action.  

The dice then came to my rescue, BIG TIME!  First a double phase that saw my tank achieve 4 hits on the white house, all of which generated shock and pinned the team inside (it had already had a point of shock and was weak having earlier lost 1 man).  Seizing the opportunity my platoon leader who had earlier joined the 'flanking section' doubled them towards the house and removed the resulting shock.  The very next phase, also being mine, saw the tank being unable to fire but the platoon leader was able to repeat his advance at the double.  The next photo, the only posed photo, shows the section strung out indicating the extent of their second advance (they were closed up with the leading figures after the photo was taken).  

Lady Luck, belying her fickle nature, stayed true to the Brits denying the Germans any Coc Dice that could rally the pinned occupants of the white house.  

Consequently, in the next phase my section advanced up to the house to post a couple of grenades through the window.  A slight hitch occurred when a 'double 1'  was thrown and the first grenade was dropped at their feet.  But in stepped Lady Luck again to limit the damage to just 2 shock.  The next grenade sailed through the window with ease and promptly killed the rest of the LMG team-cum-section.  

A discussion then ensured as to whether or not the surviving junior leader should rout, as while the shock now exceeded the number of figures all his men were dead and leaders do not take shock.  Surprisingly, John thought he should rout and I thought the rules implied he should not, albeit that in reality it seemed unlikely he would hang around.  Anyway, we went with the rout option so he fled off the table - see below.  [If anyone knows what we should've done do tell.]


With the German force morale about to start shedding command dice, John decided it was time to call it a day and withdraw.

In case anyone has done the sums and wonders why the Brits seem short of support, I did have a mine-clearing team.  They never got involved as John didn't deploy his minefields across the roads to stop my tank entering, although they did deploy into the large farmhouse with the 2 Bren teams.  

The butcher's bill for this game was 5 dead German riflemen (no leaders lost or wounded) and ZERO BRITISH CASUALTIES!

The state of the two platoons for the next game (scenario 4 of 5) is now:

British strength: 2 Senior Leaders, 3 Junior Leaders, and, 17 men to operate the PIAT, 2" mortar, 3 Bren LMGs and provide any rifle teams.  

British casualties: 14 permanently lost[1].

German strength: 1 Senior Leader; 3 Junior Leaders; and, 16 men to operate the Panzerschreck; and, 3 MG42s and provide any rifle teams[2].  

German casualties: 11 permanently lost and 2 wounded men due to return after the next game.

Notes:

1. You might've noticed something odd with the British casualty recovery as they shouldn't get any troops returning after missing a game.  As we didn't know how the error had occurred we stuck with it and let the returning soldier (see the last CoC post) rejoin his unit. 

2. The 4 Germans returning after being wounded in game three together with one immediately returning to duty from this game sees the German platoon strength unaltered.

Again!  I'll try and take more photos next time, but I find these rules so engrossing I just get sucked in.

Chain of Command CoC-ups

My friend John came round for a practise campaign using the Maltot campaign from the TooFatLardies (TFL) 'At the Sharp End' campaign rules.  We'd had a couple of learning (for him) and refresher (for me) games but now we wanted to get into a campaign which produces very different games where husbanding your troops can be as important as winning a game.


I took on the British (12 platoon, B company, 5th Wiltshires), who have to win their way across five different maps / scenarios in no more than eight games to win the campaign.  John took on the Germans who had to stop the British i.e., win 4 games before I could win five.

Game 1: a balanced patrol scenario (same number of support points each) across open fields with little cover apart from a hedge or two.  The picture below shows the first British troops deploying onto the table, advancing from left to right.  The German jump off points (JOPs) can be seen in towards the lower right. The outer boundary of hedges delineates the edge of the map.  


I immediately showed how rusty I was by deploying my 'Tactical' movement markers facing the wrong direction, Doh!


The German deployment in response was cursed by a command dice roll of 6, 5, 4, 4, 2, 1 which delivered our first rules blunder of the day; the deployment of a single team from a section (using the '1') which is not allowed in the rules.  I said it was a learning campaign.

This action had always looked likely to revolve around who could get to the hedge line first to catch their opponents exposed out in the open.  So, seeing the Germans in disarray, I doubled one section forward to try and get to the hedge first; the accompanying junior and senior leaders using their command initiatives to remove the resulting shock (disorder) caused by this.  As can be seen in the following photo they got close but didn't quite make it (the other section did not double forward). 


The Germans then suffered another dreadful command roll and were limited to a couple of team actions.  This saw them double a rifle team forward to the hedge and the section's MG42 team putting down some covering fire on the hedge to try and reduce the effectiveness of any British firing next phase (the section of hedge under covering fire being indicated by the two red 'pin' markers below).    


The Brits responded by opening fire with closest section on the rifle team at the hedge.  The British firing dice were embarrassingly good and the German rifle team at the hedge was shredded and broke, routing back all the way to their JOP.  The other Brit section doubled up to the hedge taking advantage of some well-placed smoke from their 2" mortar deployed back at their JOP as can be seen in the photo below the situation 


At this point, with the writing on the wall in bright red letters ten feet tall, Germans decided to cut their losses and withdraw, conceding the field to 12 platoon which was completely unscathed.

Game 2: on to the second map, a probe scenario, with the British having to get a team to the German base edge to win the game.  The cover favours the Germans who used their support points for a minefield, an adjutant and off-table Tiger tank support. For the Brits I decided to forgo the obvious armour support and instead opted for a pre-game barrage and a forward observer (FO) with an off-table 3" mortar battery.  The photo below shows the table from the British end after the patrol phase and deployment of the minefield.


This was the first time my new minefield markers had been used and I'm pretty pleased with how they look - much better than an old bit of string!


The game started with the Brits rolling an immediate double phase.  No doubt still a little euphoric over my quick win in the first game I deployed a section and a senior leader from my furthest forward JOP with a view to rushing the enemy base edge before they could deploy through the barrage.  My FO also deployed further back and established contact with his mortar battery.

The Germans validated my optimism by dutifully failing to deploy any troops in their turn thanks to the pre-game barrage.  Now supremely confident that my plan (is a mad dash a plan?) was the right thing to do I pressed on past the minefield; but my command dice (no '1's) prevented my either requesting a mortar barrage or deploying a 2" mortar to provide some smoke cover.

Then the wheels came off; the Germans got a double phase and in the first phase successfully deployed a section (MG42 in the farmhouse and rifle team in the garden) as seen below (clearly the photo was taken a little later as they have a casualty in the photo).


Caught in the open at close range (courtesy of having to go round the minefield) the consequences for my lead section were horrific, with three dead and three shock - see below.


The next phase of shooting was just as bad but as I forgot to take a photo we can draw a veil over the horrific scene.  I decided to persist for another phase hoping my mortars (2" firing smoke and 3" with h.e.) might retrieve the situation; but again my command dice prevented either from playing their part.  One more round of German fire saw the platoon sergeant wounded and out of action, and without his influence to steady the survivors, pressing on was futile and the tattered remnants of my platoon withdrew from the field.

Game 3: which, following the British failure was a repeat of the probe scenario with the Germans adding a second minefield to the one still in place from the previous game.  I was planning to change my approach and make use of the armour support I had spurned in the last game but... I only received 3 support points this time around.  These were spent on another pre-game barrage, which had worked reasonably well before, and an adjutant to cover the absence of my wounded platoon sergeant who would not return to duty until the next game.

This time the plan was to eschew the open fields and quickly get stuck into the farmhouse, hopefully while German deployment was hindered by the pre-game barrage.  I also intended to maximise my use of smoke from my reinforced 2" mortar team[1] to protect me from any Germans that did turn up. 

In my first phase, speed being key, I deployed both sections[2], albeit they had to skirt John's latest minefield as he had easily identified the obvious line of advance and mined it - see below.   


The pre-game barrage now proved its worth and prevented any German deployment and as the British pressed forward and deployed the Germans repeatedly failed to deploy any troops.  The situation, as shown below, was starting to look too good to be true.


It was.  At this point the game hotted up and I got so sucked in I forgot to take any more photos, and so I'll keep it pretty brief from here on.

One British section doubled, through yet more smoke, up to the farmhouse and shut down the German JOP inside.  Then, John broke his relentless run of bad luck and managed to deploy most of his troops.  As a result, one British section was shredded in the farmyard but the other managed to occupy the house.  At this point the game looked over for the Brits; but, surrounded and trapped inside the farmhouse, withdrawal was not an option.  So, with the Brits forced to fight on and the Germans unwilling to close it turned into an attritional firefight and then into a bloody grenade throwing contest.  At this point the Germans realised this was a fight they could not afford as the British could replace their platoon but the German platoon would have to fight on through the rest of the campaign.  So, settling for having ruined one British platoon the Germans withdrew to their main defensive line (the next map / scenario).

For the ongoing campaign, John and I have already fixed a date for more games, the status of the two platoons at this stage is as follows:

British strength: 2 Senior Leaders, 3 Junior Leaders, and, 16 men to operate the PIAT, 2" mortar, 3 Bren LMGs and provide any rifle teams.  

British casualties: 14 permanently lost and 1 wounded man due to return after the next game.

German strength: 1 Senior Leader; 3 Junior Leaders; and, 16 men to operate the Panzerschreck; and, 3 MG42s and provide any rifle teams.  

German casualties: 9 permanently lost and 4 wounded men due to return after the next game.

The losses are skewed in the Germans favour as, in this campaign, they recover casualties at three times the British rate.  However, the British do have a fresh platoon in the wings. 

Hopefully next time I'll take a few more photos.


Notes:

1. The British platoon was now reduced to just two sections.  The surviving junior leader and private from the decimated section being used to from a large 2" mortar team. 

2. Another error we made at this point was to assume that if LMG teams were wiped out the weapon was lost so with only 2 Bren guns I opted to go with just two sections and to reinforce my 2" mortar team.