From the German 'Kabinettskriege' - Cabinet Wars: a period of limited conflict from the Peace of Westphalia (1648) to the French Revolution (1789).
Showing posts with label Gadgets. Show all posts

Conington Contraband

[Pre-Cabinette Archives c.2014!]

The shocking age of this article explains the appalling photographs and the rather basic terrain on show with chalk roads and outlines to the woods.


This Table-top Teaser was designed give my new scratch-built houses a baptism of fire under Brig. Young’s CHARGE! rules.  It was also an experiment on adding in the roll-of-shot stick and templates for canister and howitzer shells from C S Grant’s ‘The Wargame’. 

The Scenario: involves a government force dispatched by the Elector to locate and seize contraband defended by a rebel militia supported by a small expeditionary force from a foreign, ‘francophone’, power.  Spies in the service of the Elector have reported that the rebel war-chest and records have been moved to Conington; their capture would deny the rebellion badly needed funds and provide the Electoral forces with an intelligence wind-fall.  Scouting patrols indicate the location is not well guarded and a rapid strike by a small force could get in and out before the main rebel army could respond.   To this end the Elector commanded Oberst Franz Schmidt to take a brigade of infantry, with attached cavalry and artillery, and seize any, and all, contraband in Conington, but with strict orders to return to camp before nightfall (i.e. a time limit of 15 moves within which to find the contraband – the return march is not played).  The contraband is in Conington but its precise location is unknown, therefore each house must be entered and searched.   To search a house, after any enemy have been ejected, requires 4 figures and takes a full turn.  A D6 is thrown to determine if the contraband is found; a ’6’ is required for success in the first house searched and the score reduces by one for each subsequent house searched (a house can only be searched once).  Because there are only five houses in Conington (see map below) there is a small chance that it will never be found; in which case, it was either never there or was conveyed to safety by the rebels.   


Oberst Schmidt’s brigade (organised for CHARGE!) can deploy anywhere within the area marked ‘A’ on the map (8x5 ft) and takes the first move and consists of:

  • 4 Coy.s Arberg Inf. Regt. (80 fig.s)
  • 4 Coy.s Diesbach Inf. Regt. (80 fig.s)
  • 2 Sqn.s Hohenzollern Dragoons (20 fig.s)
  • 1 Artillery btty, (2 x 6 pdrs; 1 x 5” howitzer)


The rebel force, under Chevalier Pierre Réverie, may deploy anywhere in or north of the southernmost woods and consists of:

  • 2 Coy.s of Rebel Militia (33 fig.s)
  • 2 Coy.s of French Militia (33 fig.s)
  • 2 Coy.s Grassins Light Inf. (33 fig.s)
  • ½ Sqn. Fischer Chasseurs Cav. (5 fig.s)
  • 1 Foreign Cannon (6 pdr)

The rebel force is actually weaker than the Electoral forces believe as one of the foot companies only exists in their imagination.  The rebel player secretly determines which company is only a decoy by rolling a D6: 1= Rebel Militia; 2-3 = French Militia; 4-6 = Grassins.   The decoy unit is deployed like any other but is removed once it would be visible to Electoral troops. 

Special rules: the rebel militia are allowed to skirmish like light troops but at half effect, i.e. only every second figure can fire.  Also, on each turn the rebels throw a D6 and if a ‘6’ is rolled any dead rebel militia figures may enter as a new unit through one of the zones labelled ‘X’ on the map.  To re-enter the militia casualties must include an officer or NCO to lead them.

The Game: started with rebel militia occupying the farmhouse at Dawes Lot and the wood immediately south of it (1 on map) while the wood to the north held a Grassins company (2).  The Fischer chasseurs waited further north (3) with the Grassins in the wood behind them (4).  The Chevalier posted the French militia companies in the town of Conington (no doubt to show off my new houses)...


...and set up his artillery piece to fire down the road approaching Conington (5).


The Chevalier's deployment was bold, but risky, as the Grassins in the wood by Prescott House (2) were only a decoy leaving the approach through woods to west of the Conington road unguarded.  However, the gamble paid off as the Electoral forces massed their forces along the road and against the militia in and around Dawes Lot (see photo, NB: house shell has been placed alongside the internal ruins to show the garrison within).  


To cut, what could be, a very long story short, the Electoral forces after taking Dawes Lot realised advancing on such a narrow front would take too long. Instead, orders were issued to advance on a wide front through woods on both sides of the road to exploit their superior numbers and swamp the defenders.  


In the preceding photo, the furthest wood on the left can now be seen to be occupied by local militia.  The approach on a wide front by Herr Oberst's men meant that they had clocked that the rumour of Grassins in the that wood was just that, a rumour, as the figures were removed.  The rebels were then lucky enough to roll a '6' and 'resurrect' the militia lost at Dawes Lot to oppose this line of approach.  


The change in approach by the Electoral troops proved the turning point as each line of defence was overwhelmed in turn.  Despite this, time was running short when the Electoral troops reached Conington and started storming the houses in search of contraband.  As the fifteenth move arrived a fourth house had just been seized but the church remained untaken (again house 'shells' have been placed next to their internal 'ruin' in the photo).  


Then, as the recall was sounded, Schmidt heaved a sigh of relief as the last house search ‘located’ the contraband.  Success had been snatched from the jaws of failure and the lack of progress in the early turns would go unnoticed in the warm glow of victory.

The game turned out to be a nail-biter and the houses proved functional and looked the part.  The artillery experiment was not a success, as we both found the devices too unwieldy despite the entertainment afforded by a randomised howitzer shell landing on friendly troops.  


PS: I never took any photos of the round shot bounce stick during the game, but it can be seen in the final photo of an earlier post entitled 'Tool Time'.  It is the stick at the top of the photo and alongside it can be seen the die with faces coloured to match the white, yellow and green bounce zones that determines where casualties will be inflicted.


Russo-Japanese Naval Campaign - Introduction

[Pre-Cabinette Archives c.2011-13?]

The Genesis of Russo-Japanese Naval Armageddon

A few (let’s not be too picky) years ago I became frustrated with evenly matched naval encounters where players happily sacrifice their fleet with no aim other than to rob the opponent of his.  It was clear the only way to overcome this mutually assured naval destruction was to run a campaign.  So, taking a deep breath I thumbed through my trusty back catalogue of wargaming magazines and settled on a Russo-Japanese campaign system devised by David Manley and printed in both Wargames Illustrated (#181) and Miniature Wargames (#265).  The Russo-Japanese War (RJW) was already a front-runner for this project as I was keen to exploit the quick-play pre-dreadnought rules, ‘Damn Battleships Again’ (DBA) by Phil Barker – then freely available on-line.  A quick play-test with card counters, also from the trusty Interweb (see Mikasa example below), was an unqualified success.


Filled with enthusiasm I cast around for miniatures and selected Panzerschiffe’s 1/2400 range.  They make almost every ship I wanted and being resin castings they are easier to convert/modify than metal; especially when drilling holes to mount steel rod masts.  The masts were given tops by rolling strips of paper around the masts and securing with superglue – see photo of the Russian cruiser Rurik I - yards were omitted as too fiddly/fragile for wargame models.  


The ships were mounted on magnetic tiling with a sea texture applied using fast-setting epoxy resin teased into waves and wakes with a cocktail stick.  The ships were fitted with a card spacer before mounting on the base to maintain their freeboard once the sea texture was added.  While the fleets were under construction several further play-tests fine-tuned the rules - I’m an obsessive rule-tweaker - to make the DBA rules more RJW specific and setting out how campaign encounters are translated onto the table.  


Scratch Building Naval Terrain(?) 

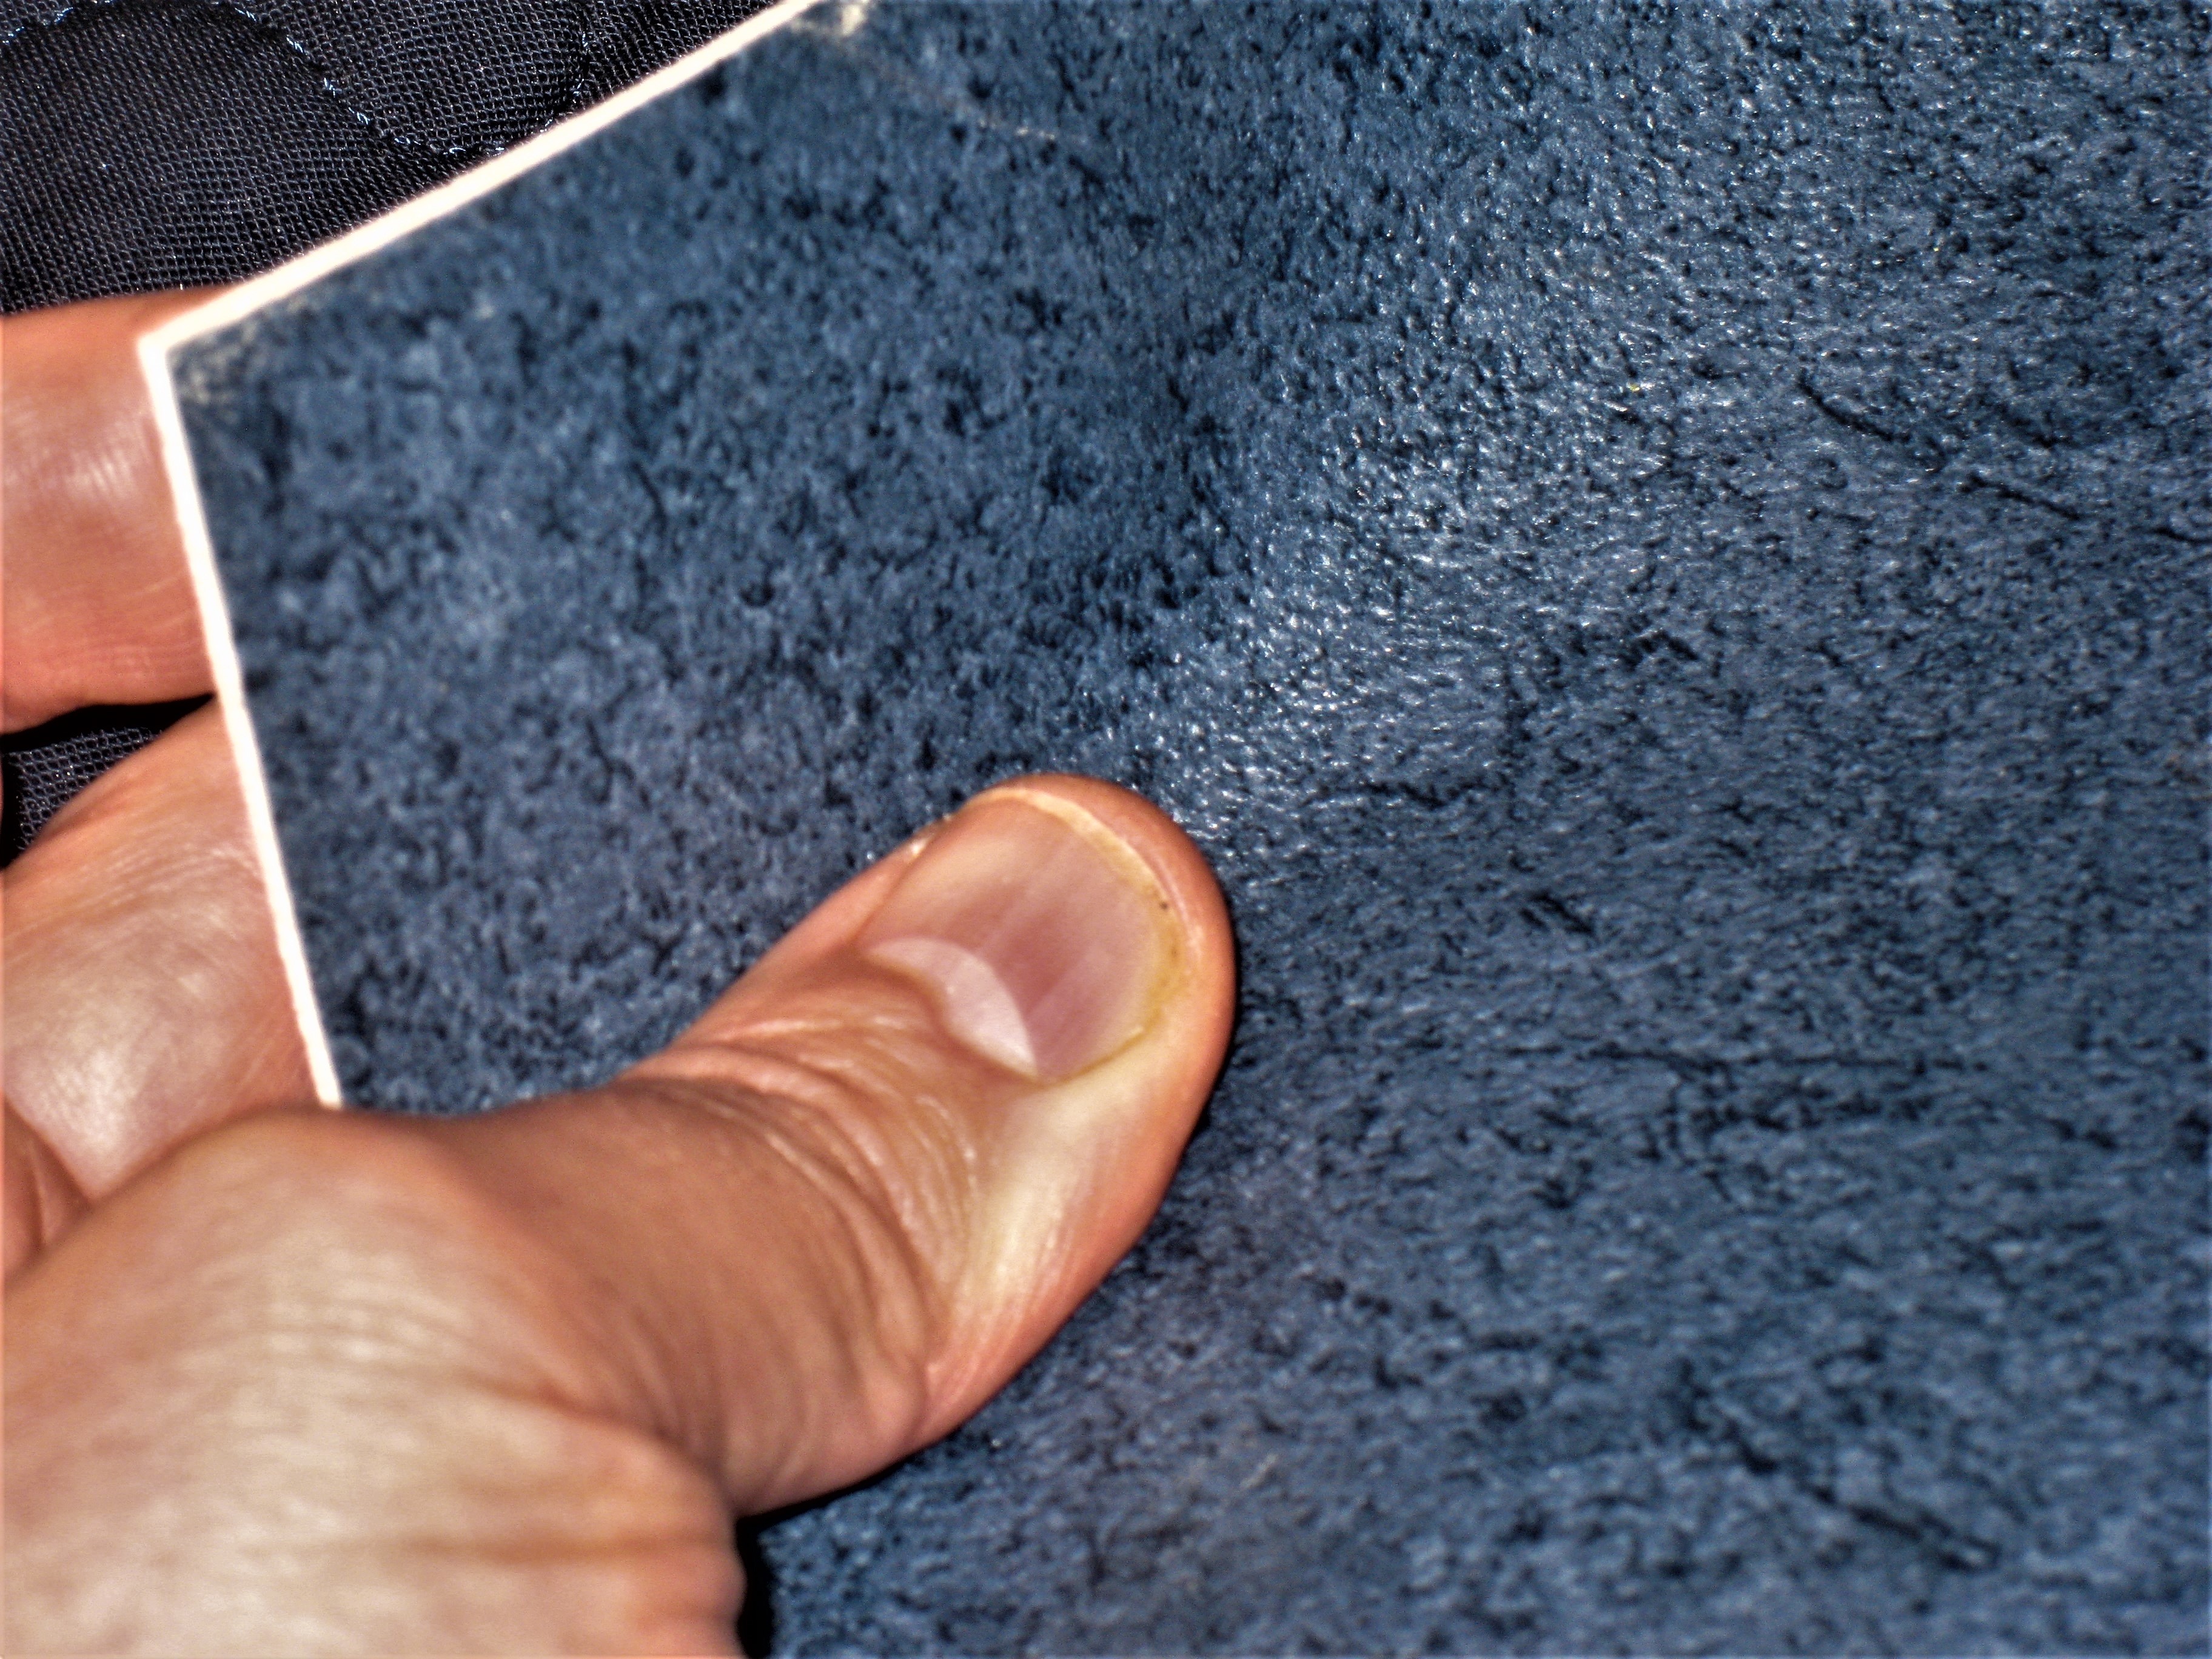
An absence of terrain is one the big attractions of naval wargaming, saving money, storage space and set-up time.  Initially I used a blue cloth for the sea but it was not ideal and would ruck if I moved my ships with insufficient care.  Needing a harder and smoother sea surface I visited my local flooring shop and found some vinyl flooring (see photo) that could be cut to match the size of my table with no unsightly joins.  


This not only looked better, but offered a much better user-experience compared to my blue cloth.  Not only does it have a slightly shiny and textured surface better suited to represent water it also lays flat with no creases despite being stored rolled up in my loft.

For islands I used my flocked Hexon hills (by Kallistra), the only other land features, which I made, were the two sides of the channel into Port Arthur.  The photos below show the western arm known as the ‘Tiger’s Tail’...  


... and the eastern shoreline.


These were made from vinyl tiles cut along contour lines and glued atop each other.  These were smeared with PVA glue onto which sand was sprinkled and finally small balsa wood building (5-10mm mm tall) were added.  

The final touch was a series of coastal battery forts (plasticard and plastic rod) the design of which was based on the structures still visible on Google Earth.  


A Handy Widget for Damn Battleships Again (DBA)

While Phil Barker’s ‘Damn Battleships Again' are fast enough to allow several actions to be fought in a single day’s gaming, I wanted to speed them even further by making some bespoke tools.  After some trial and error, I found all I needed was a single multi-purpose widget for measuring movement (distance and turning), defining arcs of fire and the 'knuckle angle'.  The ‘knuckle’ angle is the tightest turn a squadron in line ahead can make without giving the enemy an advantage when firing at ships turning in sequence at the same point. 

The pictures below show the widget in use to: 

... move (ships move in increments of base lengths); ...  


... move and turn up to the maximum turn allowed (90°); ...


... turn by the maximum allowed without creating a vulnerable 'knuckle'; ...


... and, define the broadside arc of fire.


A Quick Campaign Overview

The campaign theatre of operations is divided into several sea areas (see map). 


The Japanese accrue victory points (VPs) for successfully convoying their army across the sea to seize Port Arthur; 35 VPs being required to win the war.  The Russians win by either denying Japanese VPs or cancelling them out through actions such as bombarding the disembarkation ports.  If the Russians can delay a Japanese win for long enough the Baltic fleet arrives to save the day – or meet a watery doom at Tsushima.  Each turn (two per month), aside from the initial attack on Port Arthur, the players have to apportion their ships across variety mission types; these include patrols, convoy escort, bombardment and minelaying / sweeping.  Players must specify the route that each mission takes to its destination (the return leg is ignored) hopefully avoiding any enemy patrols.  To streamline order writing, bespoke order sheets were used (see 3-mission extract below);  a highlighter was used to indicate the mission type and route so the player only has to write in the number of ships of each type (all ships of the same type have the same characteristics).


Of the different mission types patrolling is the most important.  Successfully patrolling a sea area gives a player control of that area in the following turn which will limit their opponent’s ability to conduct missions because missions may enter an enemy controlled area but may not pass through it.   

SHIP TYPES
AC Armoured Cruiser
LC Light Cruiser
OAC Obsolete Armoured Cruiser
OBB Obsolete Battleship
OPC Obsolete Protected Cruiser
PC Protected Cruiser
TBD Torpedo Boat Destroyer
BB Battleship


Finally Ready!

At last, unlike many other abandoned projects, this one was now ready and war was declared ...      after the attack on Port Arthur!


A campaign narrative will follow in three instalments.


TOOL TIME

With an opponent unfortunately having to postpone a gaming session and my painting mojo running low, I thought I'd make a quick post on some of the tools I make for my games. 

First off, an example of my fondness for peg-boards, are my 'What a Cowboy' (WaC) peg-boards as used in a recent game.


I like TooFatLardies rules, but have always found their record sheets liable to shed tokens; these are designed to be more portable and less prone to upset.  The body is two layers of foamboard lightly glued together with the design printed on adhesive sheets (A4 labels) and wrapped around the boards with a nice picture stuck on the back to hide the joins.  The holes are punched with an awl and the pegs taken from games of Mini-Mastermind purchased off eBay.  For anyone who plays WaC the use of these should, I hope, be obvious.  I still have yet to make name plates to be attached by two pegs in the 'Name:' section.

I also made some dice for WaC, to make it obvious what the Action Dice indicate; these are shown below with similar sets I'd already made for the 'What a Tanker' (WaT) rules.

Next, my umpire's map board for my 'Breaking of the Fellowship' game (see previous posts), complete with my random movement die: four sides are marked with arrows indicating 'straight ahead' and one each for 'turn left' and 'turn right'.


This was just made from two layers of fairly thick card glued together, although I would be tempted, if making this now, to use magnetic tiles as the cardboard ones are a fairly tight fit.  As you can see, the tiles, numbered 1-25 are randomised both as to placement and orientation.  The players in the game move around a grid with the numbers reading from left to right and all oriented in the same way, thus when they leave a square through a given side only the umpire can tell them which side of which square they enter.

Finally, and including some of most recent pieces made for the cancelled gaming session, are some bespoke movement, and ranging, sticks.


The grand-daddy of them all, at the top, complete with its bespoke die, is a roundshot bounce stick for Charles Grant's 'The War Game' rules.  The rest are made for the reduced scale I use in my much tweaked (butchered?) version of Brigadier Peter Young's 'Charge' rules.  For these I equate 1" to 2cm as the 'Charge' movement distances and artillery ranges are too generous for my sub-sized table (sub-sized that is compared to Charles Grant's 9'x7' table on which most of the games seem to have been played).