
This was another practise game with John using the new 2nd edition of Chain of Command (CoCv2) before starting the Caesar's Camp pint-sized campaign. Also, to get a bit of a feel for the 1940's forces we opted to actually use the 2nd scenario from the campaign, "The Seaforth's at Trois Foetus" (don't ask me how it got that name). Anyway, the scenario map (north at the top) is shown below ...

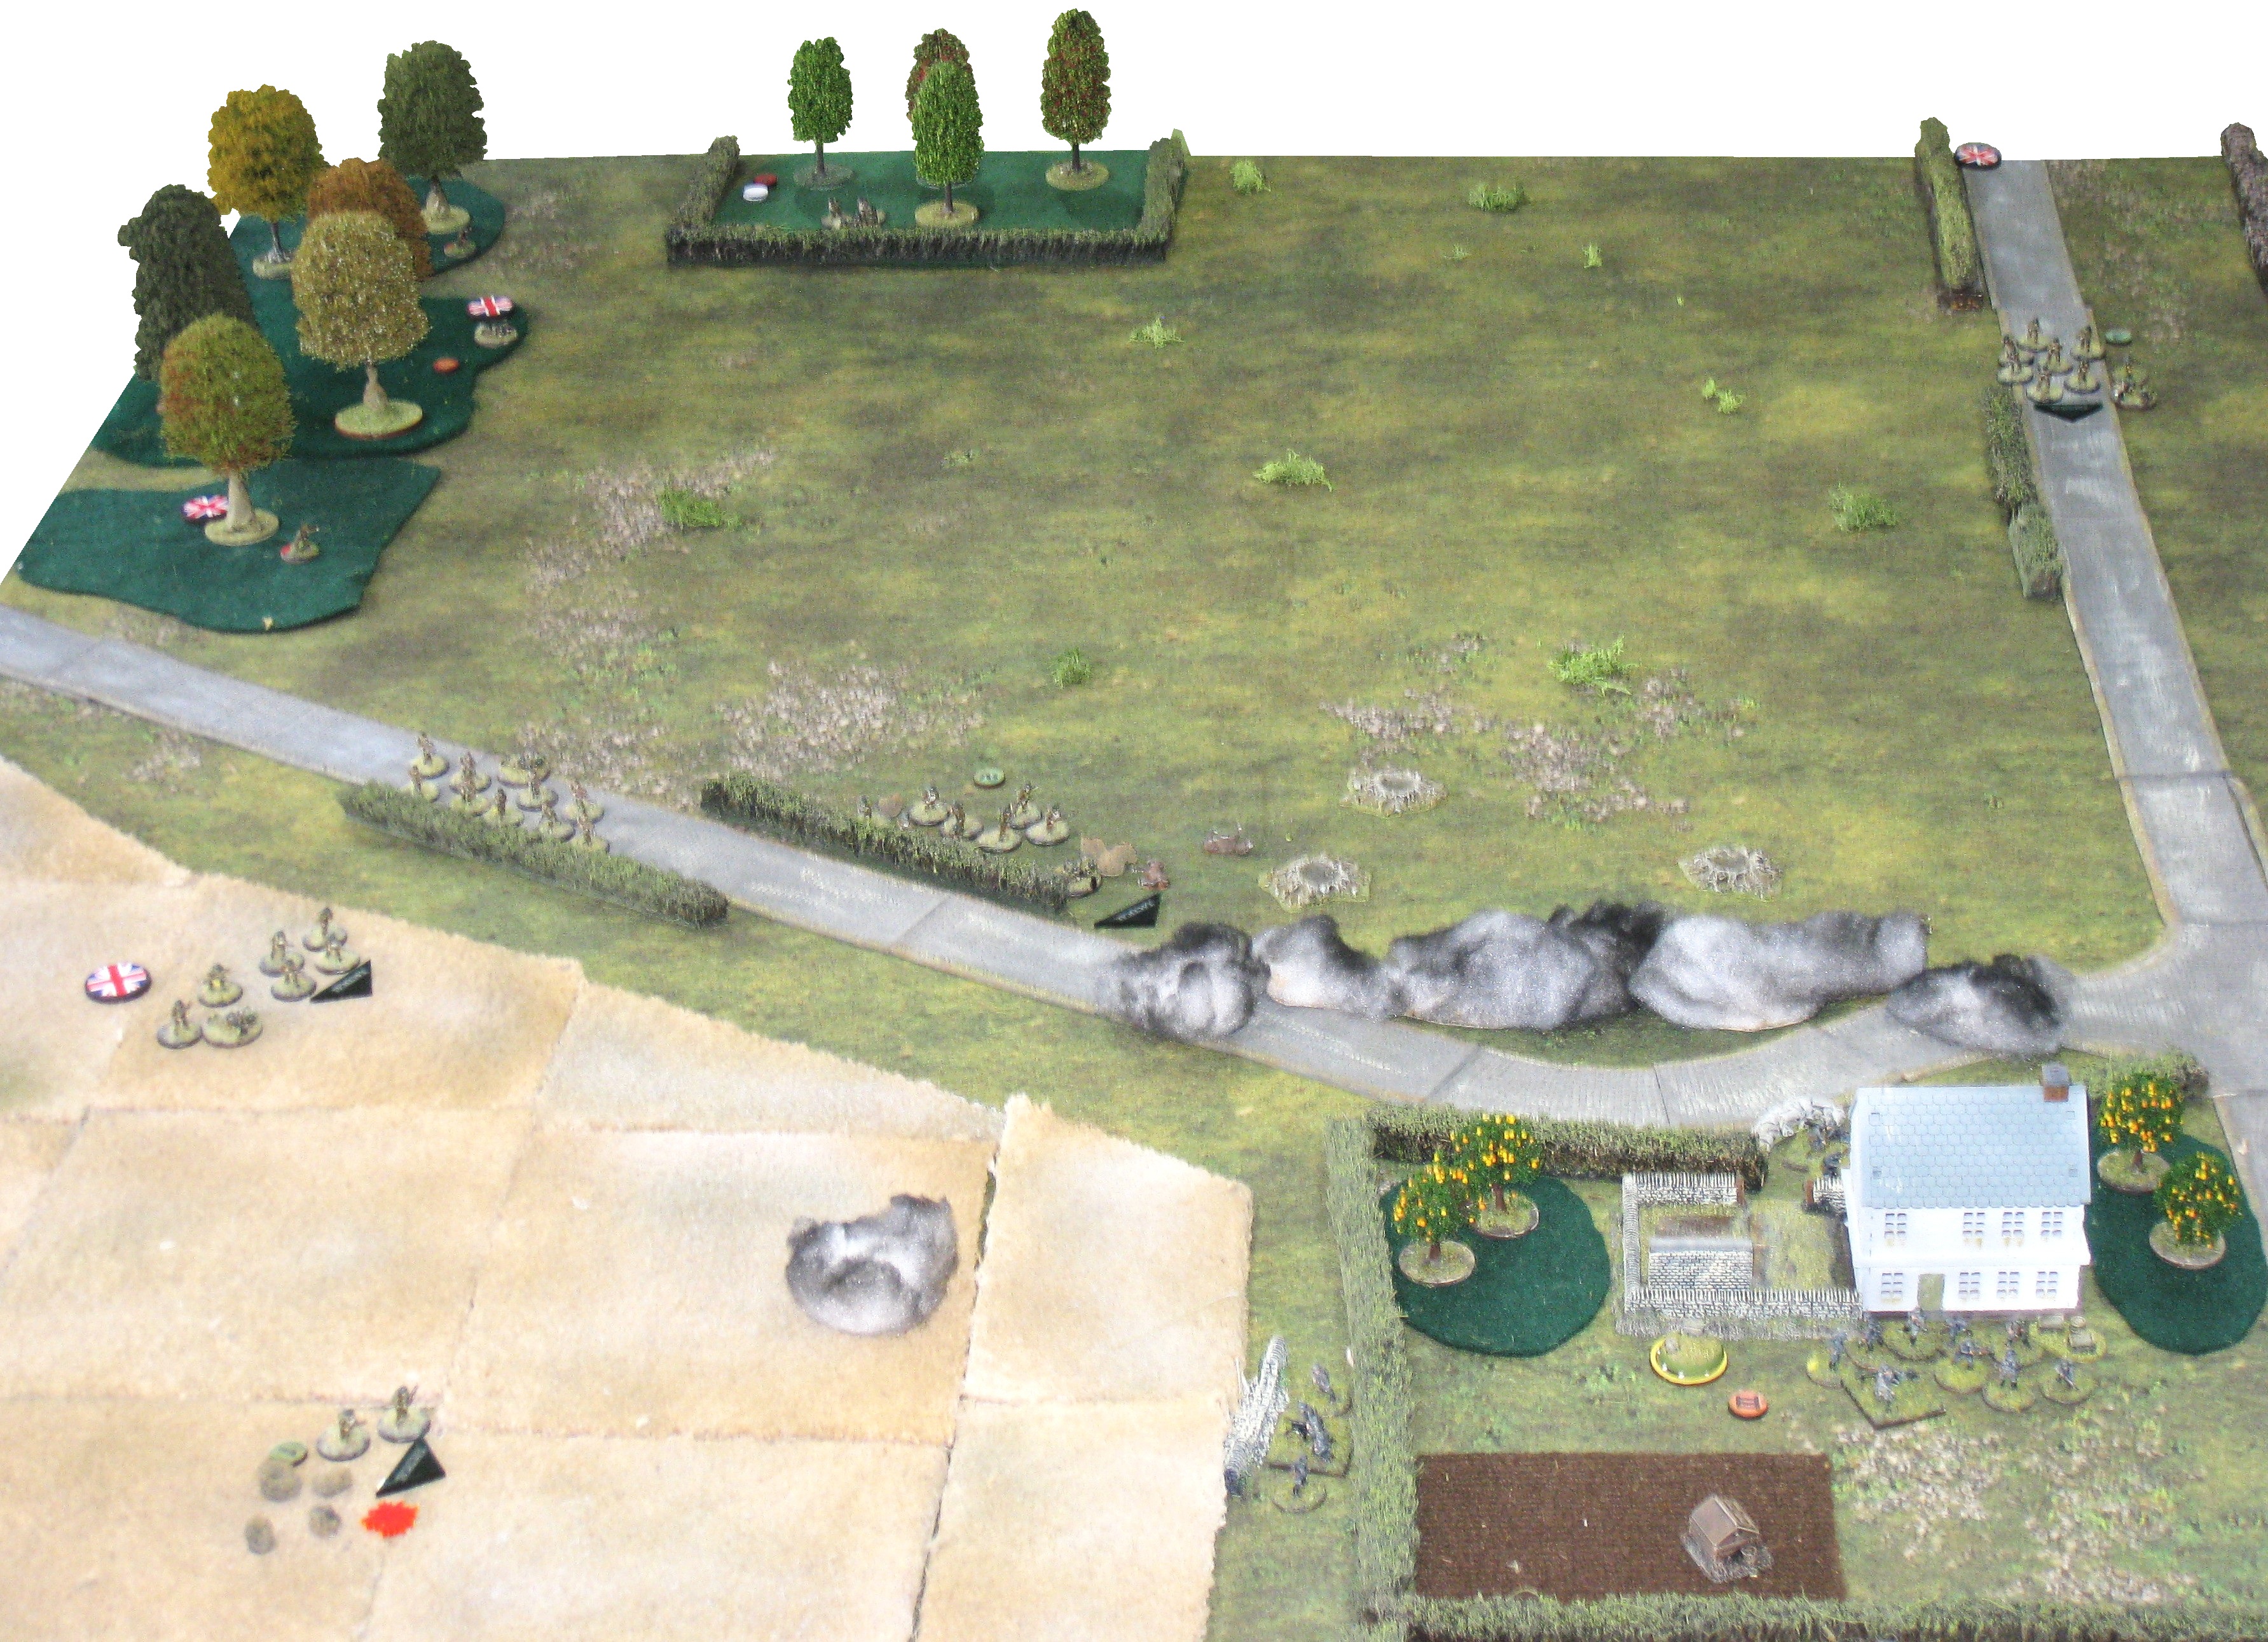
... and this is our representation of it on the table-top (viewed from the west).

The broken blue line represents the German deployment area in this 'Flank Attack' scenario and the green arrows indicate the two sides from which the Allies may enter the table. The hedge running along the southern edge was just to mark the limit of the playing area.
As I don't have any early war forces, all the terrain and troops, in this game (and in the forthcoming campaign) are from John's 15mm collection.
For support John had opted for: an adjutant, an additional infantry section and 2" mortar team; a Vickers MMG; and a Char B1 tank for a total of 16 points[1].
I chose a tripod-mounted MG34 and three entrenchments for a team (6 points).
Our rolls for Force Morale saw me with a Force Morale of 10 to John's 9.
The Patrol phase was fairly predictable as the Germans can deploy their Jump-Off Points (JOPs) anywhere in their deployment area so, it was fairly easy to rapidly lock down all my JOPs before John's could get anywhere interesting. The resulting JOPs are shown below.


It was clear I was going to have to keep an eye on this team but I wanted to delay deploying until I could inflict significant harm on as many of the attackers as possible. Consequently I took no action in my phase. I was however hoping to collect as many CoC points from my command dice while holding back from deployment (needless to say I was to throw not a single '5' until later when I did finally have to deploy my troops!).

Also, in this phase more British deployed; a section in the large wood and an entrenched Vickers MMG nearby.

The Brits were starting to show their hand, but I deemed it was still too early to show mine so I continued to pass.


While the MMG took on the scout team the section with its MG08 targeted the rest of the section in the cornfield.


My newly deployed section (in, and in front of, the Green Farmhouse) mainly piled shock on, and killed one of, the Bren team of the leading section advancing alongside the northern road. Also, the MMG MG34 put another point of shock on the scout team who were now teetering the edge of being pinned.

The photo above shows the MG34 team as pinned, we realised shortly after this that this was a mistake and the rest of the section were just behind them in the house (at this time one the ground floor as I had foreseen the need to reinforce the MG team). My initial actions in my phase were to rally off some shock and fire again at the scout team hoping to pin them this time.
What the photo does at least show is the extent of the smoke, a speciality of the British who can link together individual smoke bombs within 6" of each other to create a wide screen. Also, shown is the now pinned scout team - another error very quickly rectified as in inflicting two shock took it beyond being pinned to break. The resulting 11 on the 2d6 (+6") for a routing team saw them leave the table, but the Bad Things Happen (BTH) test left the British Force Morale unchanged (the last good throw they would ever get on BTH table).

... to take on the section advancing tactically along the eastern road.

I can't recall exactly what this shooting achieved as the section had already taken some hits earlier in the game. In fact, as the photos dried up about here, I'm having to rely totally on my hazy memory for the sequence of events.
John's response was to immediately bring on his French Char B1 up the eastern road to take on the entrenched section by the Red Farmhouse. Killing one and inflicting a point of shock. He also extended the smoke screen further to the north-west.
I then moved my section out from their entrenchments away from the tank's line of fire while elsewhere inflicting losses on his sections coming down the northern road. I also transferred all the rifle team in the Green Farmhouse to the MG34 team as it was clearly going to struggle to survive otherwise.
John then threw a treble 6! This removed all his smoke left him unable to do much else with his first phase. The photo below shows this situation (note the German section that abandoned the entrenchments by one of the ruined barns at the bottom right of the photo, and the British section that they had fired at on the eastern road has got off the road to avoid their fire and obstructing the tank behind them).

The next British phase saw a fair amount of shooting but what hits they did score only translated to a few points of shock and even fewer kills. Also, the Char B1 drove flat out down the road, why I am not sure but I suspect that moving flat out was designed to lower the chances of my off-table Flak 36 88mm gun from taking it out (I had completely forgotten to even try this in my previous phase).

Anyway, at last it was my phase and I spent the two CoC points to activate the off-table '88' engaged the tank needing 6 or more on 2D6 to hit; I rolled 3! never mind, with smoke gone it was time to punish John's infantry. The section in the cornfield had it's Bren team wiped out and the rest broke, fleeing off the table leaving behind their stunned leader. The two BTH tests for the stunned junior leader and the broken section both caused the British Force Morale to drop by 2 points, falling from 9 to 5. Just not quite enough to start the 'Final Countdown'. However, the furthest advanced platoon coming down the northern road was then hit, taking enough shock to see it pinned while the senior leader was wounded. The latter saw the British Force Morale drop a further point to 4 at which point it lost a Command Dice and I elected to start the 'Final Countdown' (to last 4 phases as that was John's Force Morale value).
This sorry state of affairs can be seen in the final photo taken in the game.

The return fire in John's phase was much reduced by the losses, pinned units and appalling dice throwing with just the odd casualty and point of shock spread across the German units. Final Countdown = 3.
So, with things now going my way it was now going to be simply a case of continuing to pour in as much fire as possible. And just to make life even easier threw two 6's for a double phase! In the first phase I couldn't do much with my command dice but did spend a further two CoC points to fire the 88, only needing a 5 on 2D6 now the tank was no longer moving; I rolled another 3! Final Countdown = 2.
In my second phase my off-table '88' I finally hit the Char B1 inflicting a net 2 hits, for 2 shock and wounded commander. The BTH test for the wounded commander dropped the British Force Morale down to 2 which triggered a 'J Rating' event - a withdrawal to a JOP. As John had a 2" mortar near a JOP that fell back to the JOP; this seemed a very underwhelming result (see discussion of the 'J Rating' in the wrap up).
All of this was soon moot as the next team that fired killed one of the British senior leaders and their Force Morale collapsed to zero and they retreated from the field - GAME OVER.
POST MORTEM
The key point to emerge over a cup of tea was that we had made no significant mistakes and now felt we were ready to tackle the Caesar's camp campaign in earnest and scheduled that for a fortnight hence.
Of the rule changes in v2 we felt they all added to the game and removed some 'super weapons' like the previous mechanics for mortar bombardments. We especially liked the use of CoC points as well as CoC dice.
In terms of new rules, we are unconvinced about the Final Countdown and Ticking Clock as they have seemed irrelevant in our practise games with forces being defeated before the clock could bring the game to an end. They seem a lot of mechanic for little effect, but maybe they'll prove themselves in future games.
The J rating however seemed a waste of time as the player can choose which unit withdraws to a JOP and in our case this was just a 2" mortar team that were already close to one. Why that team would withdraw when there many others units further forward and under fire seems counter-intuitive. We also questioned whether a pinned section could be selected as the unit to withdraw in this way but decided that seemed wrong as it made 'J' event an ideal way to extract a unit from a bad situation, i.e. a benefit rather than a penalty for failing morale. Anyway, if anyone knows whether we got this wrong do say in the comments.
Notes:
[1.] The points costs were used as in the campaign guide which, preceding CoCv2, has slightly different point costs for some items.
Another interesting AAR Rob…
ReplyDeleteYou certainly seem to be getting the hang of things…
I look forward to the ‘non-practice’ campaign….
All the best. Aly
I'm looking forward to it as well, although the start has just been postponed for a family occasion - Family First!
ReplyDelete