
Capturing Caesar's Camp, 3rd June 1940 - a pint-sized campaign
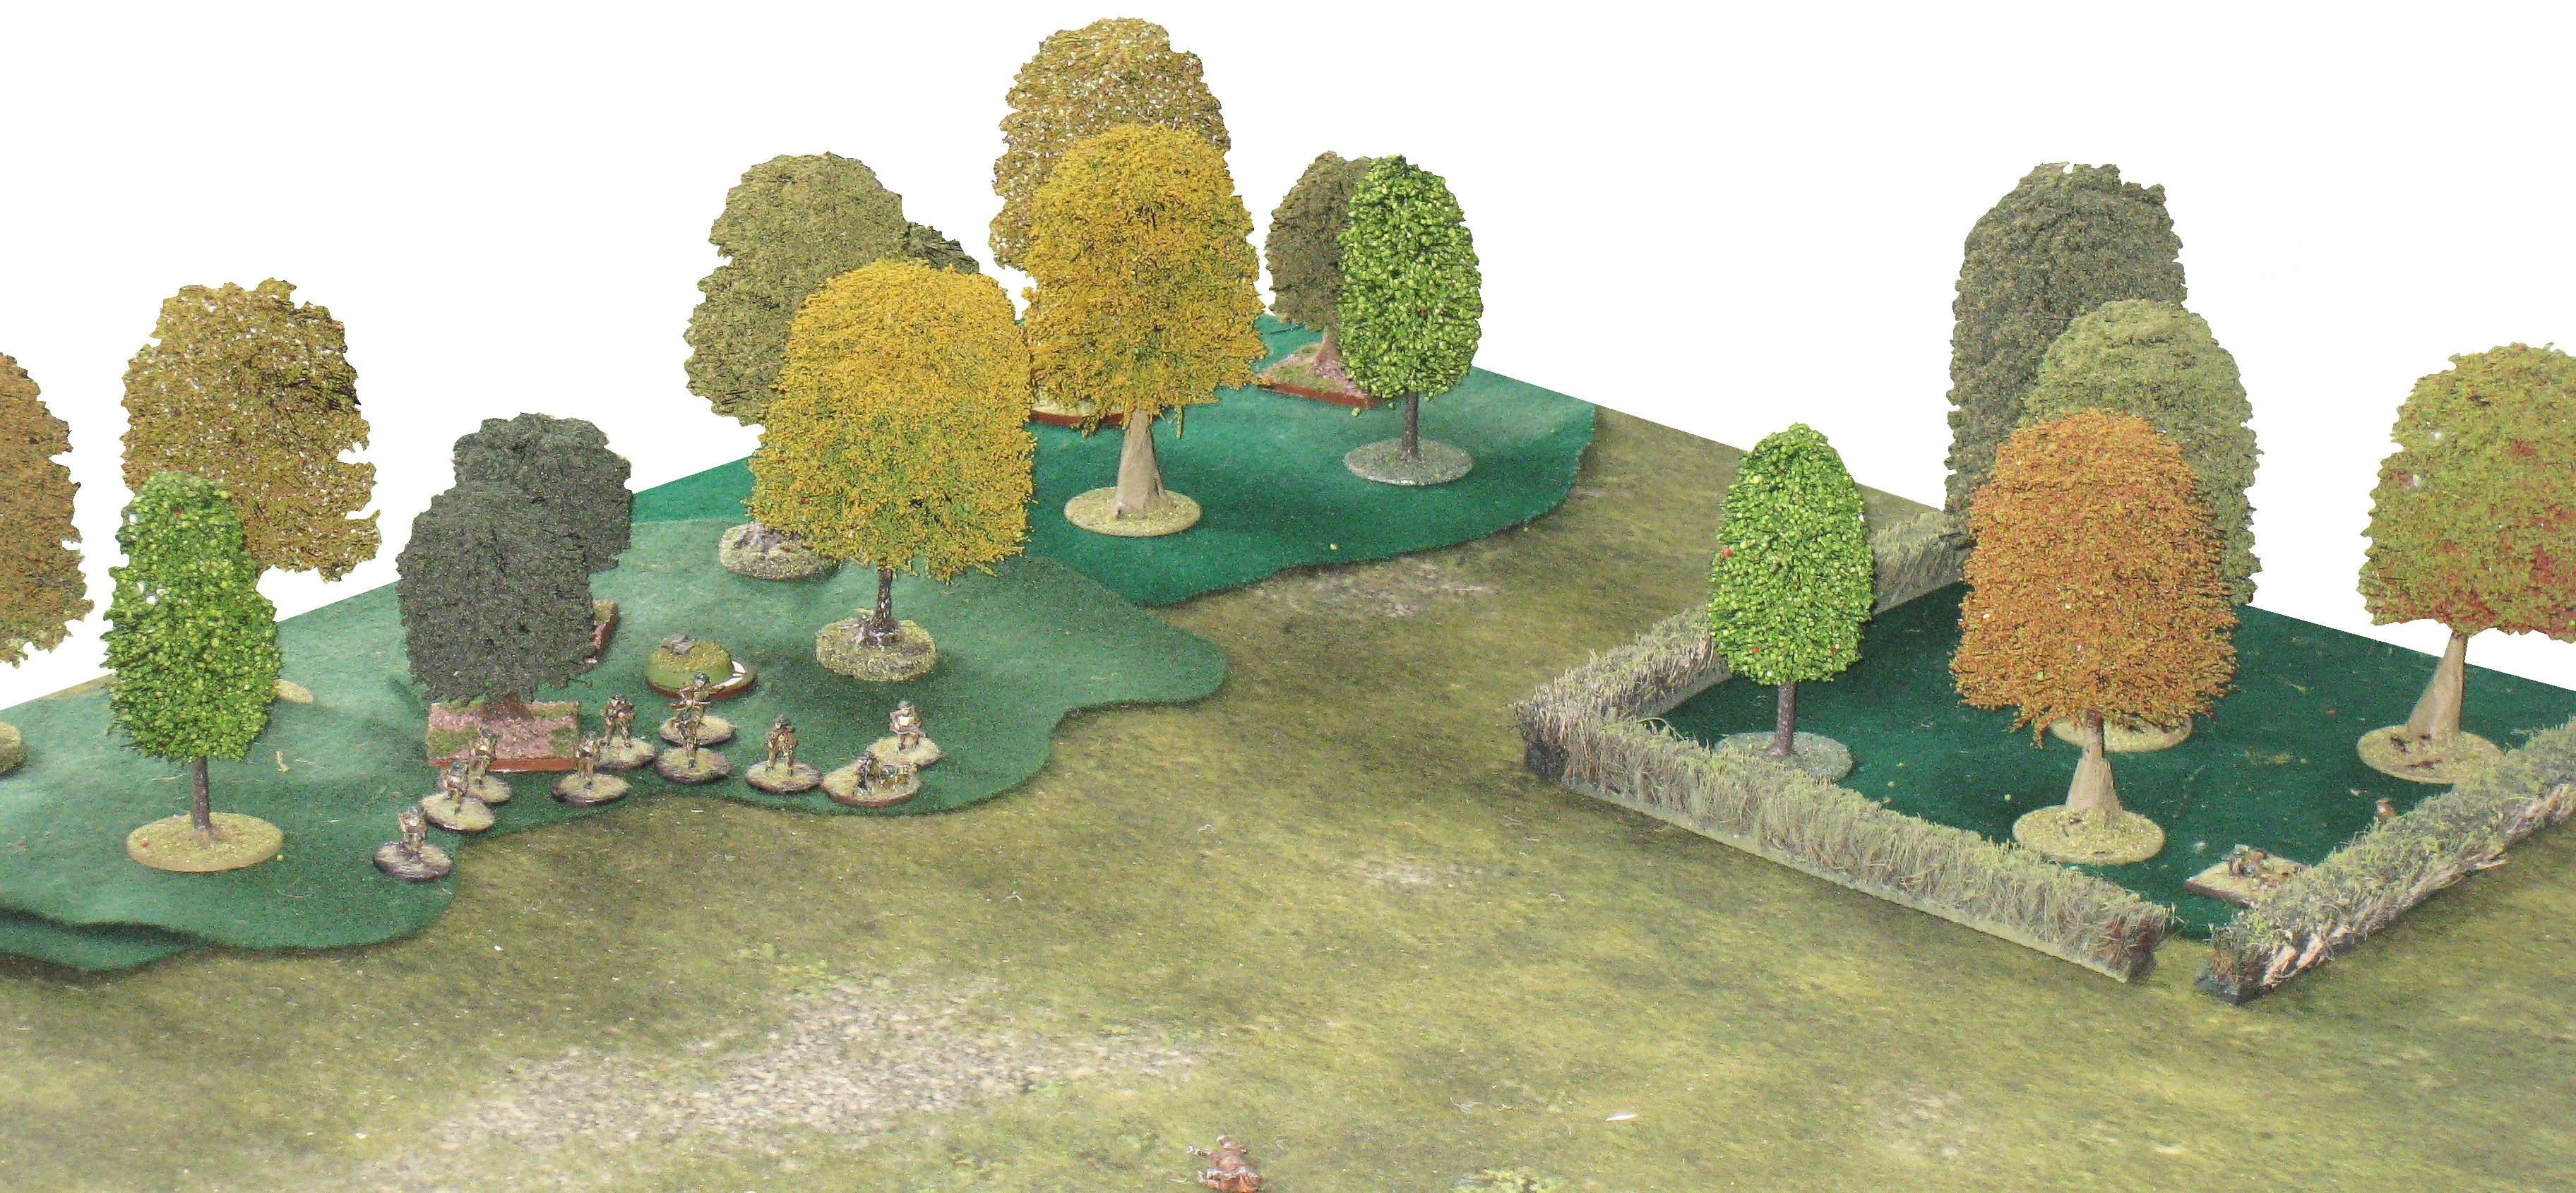
This Chain of Command (CoC) game was played immediately after Scenario 1 (previous post), and in our haste to re-set the table and get started I forgot to take my usual pre-game photos of the table as set up. But in good Blue Peter fashion, here's one we played earlier (as a one-off CoC v2 practise game).

The terrain,vehicles and figures, are all from my opponent, John's, 15mm collection. And, as he even has the cornfield sections numbered as to where they go for this scenario, the changes between this set up and the one we just played are minimal. Some of the buildings have changed as John has since acquired buildings better suited to the scenario - I'll leave it to the reader to spot any differences ...
Scenario 2 - 'The Seaforths at Trois Foetus'
This scenario (see map below) is a Flank Attack game with the attacking British (with French support) entering from the northern and eastern edges, and the Germans defending the south-western corner (the broken blue line indicates their deployment zone).

Rolling for Force Morale, I, as the Germans, again started on 11 while John's British managed a 10, one better than the last game.
The Patrol Phase
In this campaign scenario the Patrol Phase is modified such that, after the patrol phase, the Germans may place their Jump-off Points (JOPs) anywhere within the deployment regardless of where their patrol markers are. I'm not sure what was intended by this change but it incentivised some very odd behaviour in the patrol phase.
Realising my patrol marker placement was irrelevant to my JOP placement I quickly advanced my patrol markers to get them shut down as quickly, and as close together as possible (we reckoned actually stacking or overlapping them was unreasonable). This produced the following positioning of the patrol markers at the end of the patrol phase: for the German and the northern British patrols ...

... and the British eastern patrol markers, mostly on their starting positions.

The effect of this was to limit British JOP placement along a single narrow lane behind their patrol markers away from the cluster of German JOPs. With no cover along most of these lanes, the four British JOPs (marked with yellow arrows) were largely confined to their table edges.

In contrast the scenario allows the Germans to place their three JOPS freely within the deployment zone, and I placed them as shown.

Next, it was time to select support options; the Germans with only 6 points of support simply opted for two tripod-mounted MG34s (MMGs) at 3 points each. The scenario also provides the Germans with a free, 88mm, 'Bunker-buster' gun positioned off-table and firing through the western edge when activated using 2 CoC points. The British, as attackers had 16 points of support and chose, but did not disclose: a pre-game barrage (2pts); two French Hotchkiss H39 tanks (3pts each); a Vickers MMG (4pts), a 2" mortar team (2pts); and, a sniper (2pts). After this, it was down to the British, as attackers, to take the first phase.

... and an H39 tank down the eastern road; the latter, largely, but not completely, hidden from the off-table '88' by the tall bank and dense hedge lining the road at this point.

In the next German phase I again decided it was better to wait for John's men to expose themselves further before committing to deploying anything in response. With the effects of the British pre-game barrage making any deployment uncertain it was going to be a risky judgement call on how much longer to wait.


The threatened advance from multiple directions now facing the Germans looked like this:

With my deployment uncertain, and the ever-present risk of a double-phase for the Brits, I decided it was time to act and threw my command dice ... and got three '5's and two '4's!
While the '5's were very welcome CoC points, I wasn't about to deploy a senior leader on his own without troops to command so any attempt at deployment would have to wait. So, denied the ability to deploy any troops I decided to make some use of the CoC points I had been accumulating and engage the French tanks with my off-table '88'. I had been waiting for them to fully expose themselves, but could wait no longer and opened up on the lead French tank which was only partially obscured by the tall hedgerow. The result was most gratifying.

The British response was to immediately lay smoke to block the LOS from '88', which is traced through a point on the western edge of the table as nominated by the owning player when it first fires (I used a 'pinned' token to mark the spot, right at the north-west corner of the table).

Having my '88' blocked so easily was frustrating, but at least it took out a tank first and the resulting Bad Things Happen test saw the British Force Morale drop from 10 to 8. How they felt about this was unknown, but seeming to take heart from my failure to deploy any troops they immediately started to press forward down the northern road by the hedges.

John had tried this move in our previous gaming of this scenario and it hadn't turned out well; the scarecrow in the cornfield turned away as if unwilling to witness a repetition of previous bloody debacle.

The Germans in their phase, deciding to stick with what worked last time opted to deploy an MG34 (MMG) team and a senior leader, both managing to pass their deployment rolls.

In reply my senior leader used all his orders to activate the German 'Maschinengewehr' characteristic. The resulting fistful of dice, at close range, saw the cowering British section lashed with fire and taking a couple of casualties and shock. But best of all, one of the casualties was the section leader and his wounding saw the British Force Morale drop from 8 to 6 (John was unfortunately destined to throw poorly on his Force Morale tests throughout the game).
The British responded by dropping smoke in front of my MMG leaving me on tenterhooks wondering whether he would charge his section through the smoke to go in with the bayonet. In the end he decided not to and focused on trying to rally the shock off the section; a slow process with their wounded leader reduced to just one order per phase.
All John's work was quickly undone as, in my next phase, I threw three '6's for a double phase and an end to the current turn.

In the first phase, with the smoke still in place, there wasn't much I could do. But when it was removed for the next phase it would open up the fields of fire for the '88' and the MMG so I was hoping for a good command roll in the next phase. And yes, Jammy Jerry does it again, with two '6's for another double phase!
I didn't really make best use of the next two consecutive phases; just continuing to fire at the stranded section to pin them, wipe out a team or kill the section leader; none of which happened, albeit they were being slowly ground down.
Then, after three consecutive German phases, when it was finally a British phase, insult was heaped onto injury as John rolled five, yes five, '4's!


So, my phase again, and back to slaughtering the lonely section, and this time I did kill the section leader, and British Force Morale dropped from 6 to 5, just one away from losing a command die and starting the Ticking Clock to end the game.
In their phase, the British deployed a Vickers MMG to try and suppress my MG34, but as both were entrenched and at long range this was always likely to be an indecisive firefight.

But, with further support from the section in the northern wood they were starting build up shock on the MG34 team, but with an attached senior leader that was going to be manageable.


Was this just reinforcing failure?[2]
Anyway, with the British on the ropes it was time to apply more pressure to get their morale down and start the Ticking Clock. To achieve this a section was deployed into the cornfield to also fire at the beleaguered section, who were now close to being pinned.

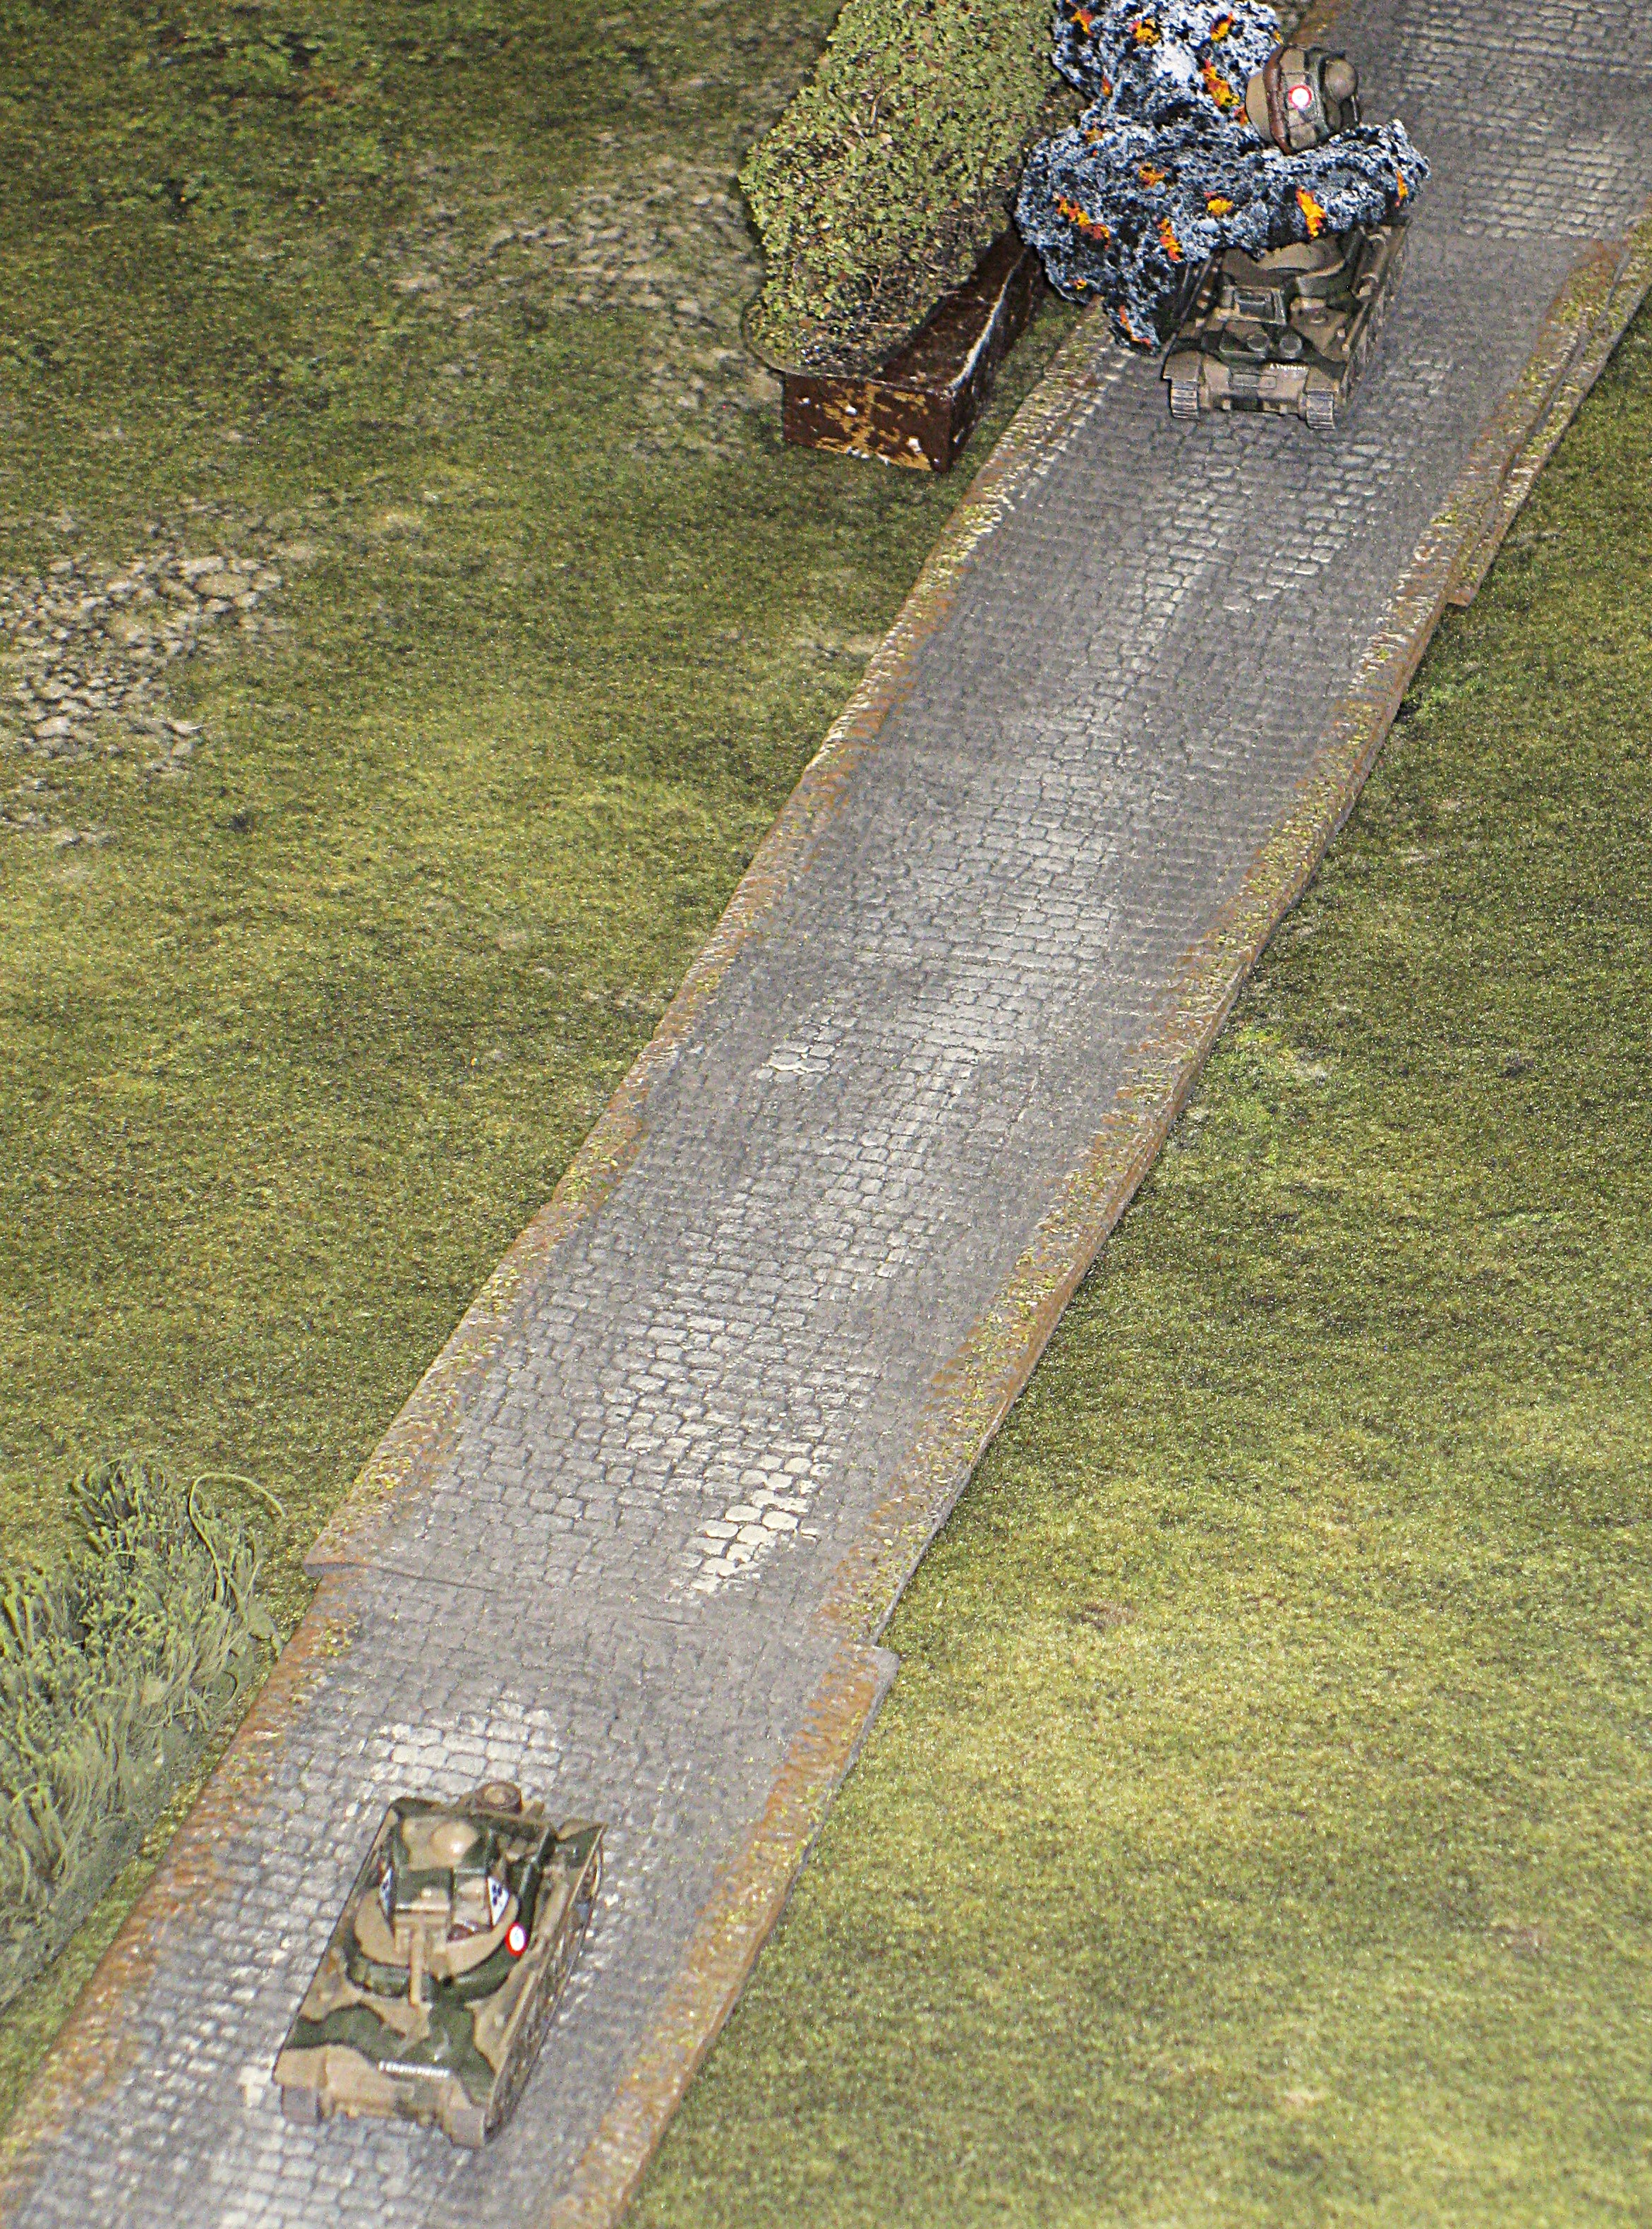
Being a small target, travelling flat out, it would harder to hit with my off-table '88'. But again I again rolled a double phase. This was lucky as my first shot missed the H39, but in the next phase it was hit and blew up.'

John, used up a CoC die at this point to avoid taking a Force Morale test for this. It didn't help, as my continued firing at the pinned British section wiped out their Bren team and in the resulting morale test British Force Morale Dropped from 5 to 4 and started the Ticking Clock.

Notes:
[1.] The days of British 2" mortars relentlessly smothering the table-top with smoke are gone as v2, in place of their unlimited supply, only gives them 3 rounds of smoke.
[2.] CoC player may be wondering at this point why the British seem to be persisting in playing on with a losing hand. That is easily explained by the fact that this platoon plays no further part in the campaign after this action so can be considered expendable. Also, if the Germans win this scenario no French tanks may be selected as support for the rest of the campaign, so who wins the game matters, but for the British the cost is irrelevant.
A great AAR Rob and I love the flying turrets on the French tanks!
ReplyDeleteThe tanks and explosions, like the rest of the set up, are all John's, but I shall take the credit for thinking of posing the turrets on top of the explosions.
DeletePlaying this on Wednesday, every time I look at the table it just seems empty. You were indeed Jammy Jerry.
ReplyDeleteAs this was played with 15mm figures on a 'full-size' table (6'x4') it's always going to look empty compared to 28mm. The real difference will come with the reduced size of the buildings which normally opens up fields of fire. But in this game they're all packed in one corner so it doesn't make a lot of difference.
DeleteGood Luck!