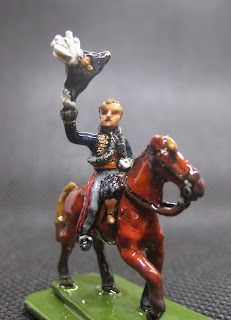
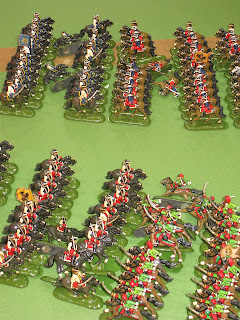
From the German 'Kabinettskriege' - Cabinet Wars: a period of limited conflict from the Peace of Westphalia (1648) to the French Revolution (1789).

A Treasured Memory on eBay

[Pre-Cabinette Archives c.2017]

One of my abiding wargame memories was discovering Miniature Wargames magazine when I came across issue 13 (June ’84) in a shop and snapped it up.  This magazine, set up by Duncan Macfarlane, was truly excellent and issue 13 a stand-out issue – the gem in the crown being Andy Callan’s ‘Landsknechts in Devon’.   Many of the pictures in Duncan’s magazines are fixed forever in my head – so I was delighted when trawling eBay to see some Hinchliffe ECW figures that I was sure had been featured in that magazine.


The figures on eBay included a two-figure base including a hand-painted standard which was clearly the same as that in an Ian Weekly article in MW13.  The hand-painted flag is so distinctive that there is no doubt it is the same figure.  Of the other figures purchased from eBay only the one directly behind the standard bearer also featured in the MW photo - see below.


Needless to say I couldn’t resist owning this piece of my past and acquired the figures, although back then I had no ECW army for them to join.

Having obtained these, for me, iconic figures, I wondered if their history might be even more illustrious than the pages of MW.  A quick search of the TTTV ‘Battleground’ episode ‘Edgehill’ soon revealed the figures were also stars of the small screen; the tell-tale flag can clearly be seen in the detail of the screen-grab shown below.   


Since then I have acquired a pair of ECW armies and these classic figures now take the field for 
Parliament as Sir William Tyrell’s troop, as that seems the best match for the flag that I can find.

Napoleonic Norwegian Ski Troops

First appearing in an earlier work in progress (WiP) post, I've finally called a halt on painting these guys.

I can't say I enjoyed painting these or am that pleased with the end result.  But I'm pleased to have finished them as the thought of them waiting on the painting desk was deterring me from painting.  The final trial was basing them on some MDF bases - first time I've ever used these.  It wasn't the MDF but the snow that caused the problems; it took me three attempts to get something passable.

Anyway, here are a couple of close ups:


As these figures were gifted surplus figures from a friend's participation game being prepared for Salute '25 I shall offer them to him as giveaways for players.  

On a more positive note, and as a beneficial side effect of basing these figures, I used the surplus Milliput (I always make up too much) for a sandbag emplacement and some shell craters for my 20mm WW2 figures.


The PoO in the Light Box

Having just completed my Hinton Hunt Prince of Orange I thought it an ideal opportunity to try out a light box I bought with the hope of improving the quality of my photographs.  So, here he is:


As usual, close ups show up the difficulty I always have with metallic paints - why will they never flow like other colours?  As for the light box, it doesn't seem to produce enough light and I had to put a box under the back drop (need some better back drops) to bring the figure nearer the lights.

All in all, I'm a little disappointed with the light box, but then it was the cheapest I could find (c. £7) so I guess cheap is as cheap does.  Unfortunately, it hasn't really answered the question as to whether it's worth investing in a more expensive version.  If it weren't overcast days, I'd be happy using natural sunlight but waiting for better light at this time of the year seems hopeless. 


CoC Maltot Campaign - Game 4

John came round today for the next round in our Chain of Command learning campaign - the push by my platoon from the 5th Wiltshires to take the Normandy village of Maltot in 1944.  The previous 3 games are covered in an earlier post.

Both our platoons were now seriously understrength (approximately one full section and others reduced to LMG teams).  Despite this, we both elected to press on, saving our one-off reinforcement option for another day.  

This scenario saw the British attacking the main defence position of the Germans and was more built up than previous games - providing good defensive positions but also some covered approached for the British.  The patrol phase saw the German jump off points (JOPs) clustered in three buildings in one corner of the table facing the large farm building holding one of the British JOPs (see below)


The Germans chose fairly passive support options, 2 minefields and 2 barbed wire entanglements, which can be seen in the above photo; their last support point being spent on an adjutant to chivvy their troops onto the table.  

The British (having a starting morale of 9 versus the German 8) took the first move and immediately established a strong firebase with a section of two Bren (LMG) sections placed on overwatch upstairs in the large house.  Their best section (only one man short of establishment) entered from a JOP placed further back together with the 2" mortar (once again placed under the control a redundant section leader).  The photo shows these troops arriving and the location of the other two British JOPs (white stars).


The Germans responded by deploying a section (really just a reinforced MG42 team) into the house with a grey tile roof adjacent to the road running through the middle of the table.  In following British phase I deployed my key support elements, a Churchill Mk IV, and a forward observer (FO) for an off-table 3" mortar battery, with my platoon sergeant, into the large farmhouse.

This seemed to spook the Germans into deploying another section into the same house (one upstairs and one downstairs). 

In the next British phase, while the FO established contact with the 3" mortar battery, the Churchill edged forward and put a round into the house holding the two German sections (to no effect) and the British section, who had been joined by the platoon leader, advanced further as though 'left flanking'.  The 2" mortar also placed some smoke in front of the German occupied house.

To counter the nascent flanking move the Germans sent one of their 'sections' across the road, through the British Smoke, to occupy the white house (with the badly shot up render).  At the same time their senior platoon leader deployed behind the smallest building holding a German JOP, why I don't know.


This early deployment by the Germans, probably an overreaction to their experience deploying after a pre-game barrage in the previous games, was to prove their undoing.  But not until after they had a triple phase that saw their MG42 team taking cover behind the wrecked lorry to fire at my advancing section.  However, in a breathtaking series of unlucky dice throws, all three rounds of German firing only inflicted 2 shock on my section. 

In my next phase the British flanking platoon decided not push their luck and pulled back behind the barn. This allowed the FO to call in a barrage from their 3" mortar battery.  The FO dispensed with an aiming shot, calling in an immediate barrage which luckily landed on target first time!  The outer edges of the barrage, which extends off table beyond the German baseline, are marked by lengths of smoke in the photo below. 


This barrage pinned the German section in the JOP house next to the road and also just caught, and pinned, their platoon leader behind the derelict outhouse.


 The barrage was to prove frustratingly ineffective in terms of killing anyone, but left the Germans in a really sticky situation with the only section not pinned by the barrage stuck in the road.  It couldn't go back because of the barrage and entering the house would see it subjected to fire from the Churchill to which it could not reply.

The action then slowed to a steady drumbeat of tank fire and mortar rounds with the Germans hunkering down (mostly in hard cover) and hoping to win the battle of the CoC dice.  Eventually, they did win, courtesy of a double, and then a triple phase, including an end of turn (three 6's).  This left me out of CoC dice to keep my barrage going when he used his third(!) CoC dice to end it.  As soon as the barrage ended, the German platoon leader, again for reasons I couldn't fathom, fled to the table edge furthest from my troops - he can be seen in the foreground of the image below, cowering behind a hedge.


My FO's attempt to request another barrage, first met with a response to 'try again later' and then, later, with a blunt refusal to provide any more fire support during this action.  

The dice then came to my rescue, BIG TIME!  First a double phase that saw my tank achieve 4 hits on the white house, all of which generated shock and pinned the team inside (it had already had a point of shock and was weak having earlier lost 1 man).  Seizing the opportunity my platoon leader who had earlier joined the 'flanking section' doubled them towards the house and removed the resulting shock.  The very next phase, also being mine, saw the tank being unable to fire but the platoon leader was able to repeat his advance at the double.  The next photo, the only posed photo, shows the section strung out indicating the extent of their second advance (they were closed up with the leading figures after the photo was taken).  

Lady Luck, belying her fickle nature, stayed true to the Brits denying the Germans any Coc Dice that could rally the pinned occupants of the white house.  

Consequently, in the next phase my section advanced up to the house to post a couple of grenades through the window.  A slight hitch occurred when a 'double 1'  was thrown and the first grenade was dropped at their feet.  But in stepped Lady Luck again to limit the damage to just 2 shock.  The next grenade sailed through the window with ease and promptly killed the rest of the LMG team-cum-section.  

A discussion then ensured as to whether or not the surviving junior leader should rout, as while the shock now exceeded the number of figures all his men were dead and leaders do not take shock.  Surprisingly, John thought he should rout and I thought the rules implied he should not, albeit that in reality it seemed unlikely he would hang around.  Anyway, we went with the rout option so he fled off the table - see below.  [If anyone knows what we should've done do tell.]


With the German force morale about to start shedding command dice, John decided it was time to call it a day and withdraw.

In case anyone has done the sums and wonders why the Brits seem short of support, I did have a mine-clearing team.  They never got involved as John didn't deploy his minefields across the roads to stop my tank entering, although they did deploy into the large farmhouse with the 2 Bren teams.  

The butcher's bill for this game was 5 dead German riflemen (no leaders lost or wounded) and ZERO BRITISH CASUALTIES!

The state of the two platoons for the next game (scenario 4 of 5) is now:

British strength: 2 Senior Leaders, 3 Junior Leaders, and, 17 men to operate the PIAT, 2" mortar, 3 Bren LMGs and provide any rifle teams.  

British casualties: 14 permanently lost[1].

German strength: 1 Senior Leader; 3 Junior Leaders; and, 16 men to operate the Panzerschreck; and, 3 MG42s and provide any rifle teams[2].  

German casualties: 11 permanently lost and 2 wounded men due to return after the next game.

Notes:

1. You might've noticed something odd with the British casualty recovery as they shouldn't get any troops returning after missing a game.  As we didn't know how the error had occurred we stuck with it and let the returning soldier (see the last CoC post) rejoin his unit. 

2. The 4 Germans returning after being wounded in game three together with one immediately returning to duty from this game sees the German platoon strength unaltered.

Again!  I'll try and take more photos next time, but I find these rules so engrossing I just get sucked in.

Speed Painting Toy Soldier Style ...

... and Black Lining the Easy Way

I like my Spencer Smith figures to have an 'old-school', 'toy soldier' look, this has the added advantage of making them quicker to paint as I am normally a very slow painter and still using enamel paints.

My system simply consists of a white undercoat overpainted with crude blocks of colour, followed by black outlining and then a good coating with lashings of gloss varnish.  This technique seems to deliver effective looking figures reasonably quickly but you can judge for yourself from the photos below showing the last three stages in this ‘painting’ process.  I will at this point come clean and own up to an additional ‘touching up’ phase after the black lining to cover up any slips and add some quick grey highlights on black areas and horse manes and tails.  


I used to outline with black paint but found that the most fiddly and time-consuming part.  To find a better way I tried using pens but the ink tended to run when varnished.  Persevering I hit upon Edding 1800 Profipens (I use the 0.1mm variety) that do not seem to run as much, although I still use a thin spray of varnish which I let dry to seal the figure before brushing on a thick layer of enamel gloss varnish.  


I do not use the pens when delineating between two white areas as IMO the black lines look too harsh.  For this I use a pencil which creates a nice grey line and the metallic graphite sheen disappears when varnished – I strongly advise a light spray of varnish to seal pencil before varnishing by brush.

TOOL TIME

With an opponent unfortunately having to postpone a gaming session and my painting mojo running low, I thought I'd make a quick post on some of the tools I make for my games. 

First off, an example of my fondness for peg-boards, are my 'What a Cowboy' (WaC) peg-boards as used in a recent game.


I like TooFatLardies rules, but have always found their record sheets liable to shed tokens; these are designed to be more portable and less prone to upset.  The body is two layers of foamboard lightly glued together with the design printed on adhesive sheets (A4 labels) and wrapped around the boards with a nice picture stuck on the back to hide the joins.  The holes are punched with an awl and the pegs taken from games of Mini-Mastermind purchased off eBay.  For anyone who plays WaC the use of these should, I hope, be obvious.  I still have yet to make name plates to be attached by two pegs in the 'Name:' section.

I also made some dice for WaC, to make it obvious what the Action Dice indicate; these are shown below with similar sets I'd already made for the 'What a Tanker' (WaT) rules.

Next, my umpire's map board for my 'Breaking of the Fellowship' game (see previous posts), complete with my random movement die: four sides are marked with arrows indicating 'straight ahead' and one each for 'turn left' and 'turn right'.


This was just made from two layers of fairly thick card glued together, although I would be tempted, if making this now, to use magnetic tiles as the cardboard ones are a fairly tight fit.  As you can see, the tiles, numbered 1-25 are randomised both as to placement and orientation.  The players in the game move around a grid with the numbers reading from left to right and all oriented in the same way, thus when they leave a square through a given side only the umpire can tell them which side of which square they enter.

Finally, and including some of most recent pieces made for the cancelled gaming session, are some bespoke movement, and ranging, sticks.


The grand-daddy of them all, at the top, complete with its bespoke die, is a roundshot bounce stick for Charles Grant's 'The War Game' rules.  The rest are made for the reduced scale I use in my much tweaked (butchered?) version of Brigadier Peter Young's 'Charge' rules.  For these I equate 1" to 2cm as the 'Charge' movement distances and artillery ranges are too generous for my sub-sized table (sub-sized that is compared to Charles Grant's 9'x7' table on which most of the games seem to have been played).

 Half a Hex, Half a Hex, ...

             ... Half a Hexon-ward


Using hexes for movement has the advantage of removing any fiddly measurements to determine what moves our table-top units can, or cannot, perform on the table-top.  Converting wargames rules to use hexes does require a number of choices to be made and when it comes to unit facing I for one am firmly in the ‘face the vertex’ camp as shown in the diagram below.  Facing the vertex as opposed to the ‘flat’ works well for defining frontal arcs, flank and rear zones but means forward movement follows a zig-zag course with units staggering forward like drunkards.  


One of the rule-sets I have re-jigged to work on hexes is DBM using 15mm figures on 4cm wide bases, which gives two elements side by side in the 10cm-wide Hexon tiles that I use.  One day while wrestling with zig-zagging units my opponent, Martin, pointed out that as elements only occupy half a hex why not let them move straight ahead, elements in the right-hand side of the hex advancing into the left-hand side of the hex ahead (see diagram below).  The simple elegance of this solution was immediately apparent and why I had been unable to see it before escapes me – sometimes it can be hard to see beyond customary practice.


I think this system works well but clearly, it’s dependent on relative unit/element width and hex size.  However, 4cm is a fairly standard 15mm base width and Hexon is one of the more common systems (I have no connection with the company that makes it).  I doubt this has not been thought of before but I haven’t seen it being used elsewhere so thought I’d share it.


 Old & New Games - Day 2 of 2

On the second day, we were joined by George, and the four of us engaged in some 'Old-School' nostalgia with Spencer Smith armies fighting it out with a trimmed down version of Brigadier Peter Young's 'Charge!' rules.


The Battle of "Lobositz-ish"

The scenario was very loosely based on the battle of Lobositz with a better quality 'Prussian'[1] army (Martin and Steve) attacking a larger 'Austrian' army (George and me) defending a strong position (the town and a sunken road represented by a hedge).  The starting positions are shown below - not a great photo as my cabin's not big enough to get far enough away from the table and my camera is a bit past it.


Also, to stop the low sun coming through the windows and throwing sharp bands of light across the table the red blinds were drawn which accounts for the rosy glow in many of the photos, luckily not in the closer shots of the 'Prussians'...


...and Austrians.


The battle opened with the cavalry on both sides advancing to take control of the open part of the battlefield away from the town.  


The Prussians suffering from the attentions of the Austrian guns, courtesy of George's first dice roll of the game being a double-six!


The next turn saw a massive cavalry mêlée in which the Austrian dragoons and hussars came off second-best against the Prussian cuirassiers. 


At the other end of the field a mass of redcoats formed up and started off to assault the Austrians defending the sunken road (hedge)... 


...and the Croats started to harass the Prussian grenadiers.


Subsequent turns saw the Prussian cavalry turning on the infantry protecting my battery.


Elsewhere, both sides were beginning to rue their actions as the massed Prussian redcoats continued their advance leaving a trail of dead and dying in their wake...


...and the Croats found, to their cost, that harassing grenadiers can be a dangerous occupation.


The casualties among the redcoats proved unsustainable and with the Austrian cavalry staging a bit of comeback the Prussians used their last intact cavalry regiment to eliminate George's battery that had inflicted huge losses.


With time pressing and Martin and Steve feeling a further Prussian infantry assault against the Austrians defending the town would be futile they accepted defeat and shook hands and called it a day.


So, just time for a quick photo call for the commanders, starting with the winning Austrian C-in-C, George, ...


...his second in command, me, ...


the Prussian commander in chief, surveying the cost, Martin, and...


...his second in command, Steve.


The game was enjoyable, but the strength of the Austrian position was really too much for the smaller but better quality Prussian force; a useful lesson for future games.  I also got more ideas for further streamlining the 'Charge!' rules for my next gaming session - a Charles Grant Tabletop Teaser, 'Advance Guard' from the June '78 issue of 'Battle' magazine.

Notes:

1. Actually, a mongrel collection of British, Bavarian, Hanoverian, Hessian, etc. as my collection, for the War of the Austrian Succession, contains no Prussians.