From the German 'Kabinettskriege' - Cabinet Wars: a period of limited conflict from the Peace of Westphalia (1648) to the French Revolution (1789).
LotR Fernando Touch Up Complete

Just a quick post to celebrate completing touching up my Lord of the Rings figures that I got painted by Fernando Enterprises.

First is Faramir and his Ithilien Rangers; Faramir needed more work than his men, which was slightly annoying as I paid for Super Showcase standard for him.


Then some more good-guys in the shape of some Rohirrim foot warriors.


And finally, some more opposition in the shape of Uruk Hai.  These didn't seem to be up to the standard of others so quite a bit of extra shading was applied.  Also, to make then a bit more visually interesting I added shields (3D printed from eBay) as only two of the original figures had them.


So, these guys should hopefully be taking the table soon for a game of Dragon Rampant.

***************ADDENDUM***************

As commented by someone on TMP it was a bit silly to show the retouched figures without photos of them as received from the painters.  As I didn't take any before retouching, the following photos are some of those provided by Fernando Enterprises for approval before sending them back; they are not high resolution but they didn't provide anything bigger (I did ask).

First some of the goblins - these were IMO the best painted of the different figures and I did nothing to them apart from the bases.


Likewise, the Warg riders (mounted on Ral Partha wolves) which also, IMO, needed no retouching.


By comparison the Uruk Hai were a bit disappointing (I added shields to these) ...


... especially the faces on the archers where not covered by helmets (some of these got small shields added).


The Ithilien rangers as finally received were pretty good and only had minimal retouching e.g. sword hilts which were painted brass all over and to the faces that where seen were pretty crude.


On the subject of faces, the initial sample photos (see next photo) had the eyes painted white with dots, which I requested them to change (as well as brightening up the green used for cloaks etc.).


And pretty much the same again for the Rohirrim on foot.


The mounted Rohirrim were quite heavily reworked by Fernando after I requested more work but and as re-worked were pretty good (almost nothing done to these apart from repair to a figure that lost an arm - the only damage in transit).


So, onto the Super Showcase personalities, and Faramir - with white eyes. 


I requested some rework which produced this.


I still didn't like his face so that was heavily retouched - faces seems to be a major weakness and I retouched them on all but the goblins but luckily most were obscured by helmets so didn't require much.  

And finally, Eomer in the first photo sent for approval.


This photo almost had me give up, but I requested a complete repaint of the horse and some more colourful equipment for Eomer who looked pretty dull for the heir apparent to the throne.  And the next photo received was a dramatic improvement. 


So, the lesson I have drawn from all this is that Fernando can be a bit hit and miss with their painting but are very willing to make changes or rework figures if you are not satisfied, so if not satisfied say why and ask for changes.  Obviously, it can be quite onerous explaining exactly what you want changed, but in my experience it is well worth the effort as they do their best to please.  

One final point, the figures look better in the hand than they do in the photos - I was pleasantly surprised when they arrived how much better they looked.  Of course, some of this is down to viewing them with the naked eye and not through a powerful camera lens.


WiP Basing and Some Away Games

While I've finished the basing fix for my SSM figures (last post) basing is still dominating my painting desk.  This time it's painting, texturing and dry-brushing the bases for some Games Workshop Lord of the Rings figures to allow my skirmish game to expand so I can play Dragon Rampant or similar.  Doubting I'd ever get the figures painted myself (too much else in the queue) I sent them[1] off to Fernando Enterprises in Sri Lanka.  

They took longer than I was expecting (c. 6 months) and there was a lot of to and froing as they sent pictures and I requested improvements but eventually they arrived.  I was pleasantly surprised to find the figures look much better in the hand than in the photos they sent for approval; the images they send are very small.  Now I just had some minor repairs and touching up to do, plus a lot of base work - I had decided to not let them finish the bases as I knew the painting style would be very different to mine and I wanted to make the bases the same as my other figures to help them blend in.

So, first, some of the 'bad guys', goblins ...


... and Warg riders (I don't like Peter Jackson's take on Wargs).


And, ready to ride down everything in their path, THE ROHIRRIM!


I still have some touching up to do on the Uruks, which seem less well-painted than the rest (different painter?) but that shouldn't take long now.  So with all these 'armies' gathering war is imminent; no doubt my giant eagles will keeping an eye on things.


As a pleasant interlude during all this, fairly tedious, basing work, I went down to Steve's place for a weekend's gaming get together with some others.

The first game was a 'chit game' of the Battle of Liegnitz (1241) which, true to history, was won by the Mongols.  I came seventh out of seven once the VPs were totalled but comforted by the prettiness of my troops (Martin's vintage 15mm Minifig Knights - I had more than this but I liked this close up).


Other games included chariot racing with a modified version of Circus Maximus using Martin's Essex Miniatures chariots ...


... and 6mil Napoleonic game on Steve's sculpted Waterloo terrain (really need to get the backdrop sorted).


This was a fictional Austrian-Bavarian clash (not sure how they ended up in Belgium) and really a play-test for my modified version of Jeffrey's Napoleonic rules as I very much like the command and control system.  The game showed promise but there's still work to do.  This was not too surprising as I had been adapting it to play on a hex-grid and had to rapidly adjust it for a free-form game on the sculpted terrain, but it is so pretty I'll add a few more photos.


That's all for now.


Notes:

[1.] The lot consisted of: 57 Goblins; 14 Uruk Hai;  7 Goblin Warg riders; 14 mounted Rohirrim and 12 on foot plus a mounted Eomer figure; and, 12 Ithilien Rangers plus Faramir (on foot). 
Covert Sabots - Old-School Basing

With my painting desk taken up with figures waiting for their gloss varnish to dry, and no game coming up that needs any prep, I was at a bit of a loose end.  As the figures had been varnished because I had shaved down their bases to better fit my storage trays, I thought why not a quick post on my basing system.

Inspired by CS Grant's 'The Wargame' and Brig Peter Young's rules 'Charge!' I wanted to keep my troops based as single figures.  Needless to say, this makes moving the troops a laborious exercise.  Nowadays, sabots would be the obvious answer to this dilemma, but they were less common 20+ years ago.  Also, I wanted it to look like the figures were single based.

The answer was steel bases exactly the same shape as 8 infantry figures bases and magnets mounted in the base of the figures - see below.


The custom-made steel trays were commissioned from Essex Laser Job Shop Ltd., an expensive indulgence but worth it IMO.  They were sprayed the same colour I use for my toy soldier bases.  I hope you agree they are pretty unobtrusive, or covert, as per the title of this post.

I did get some sample magnets made up, the same size and shape as the figure bases, but if I'd opted to go with these it would have been more an order of magnitude more expensive than the trays.  Also, it turned out that the magnets didn't like sitting adjacent to each other on the trays - just getting samples was a lucky escape.

In the end, the magnets I used were just readily available rear-earth disk-shaped magnets source on Amazon.  To make their fitting easier, I bought Litko ferro-sheet, pill-shaped bases with a pre-cut hole into which the magnets would fit.  The bases were then finished by using Milliput to create a nice rounded shape to the base.  

The infantry bases are 15mm wide and 25mm long, each end being a semi-circle 15mm in diameter.  My cavalry bases are the same width but twice as long.


This means that one cavalry figure has the same footprint as two infantry figures, well almost if you ignore the bit where the two infantry bases touch.  This can be seen here with cavalry figures on some half-sized bases (4 infantry or 2 cavalry as opposed to the standard 8 infantry or 4 cavalry) which used for flexibility and casualty removal.


As can be seen I use two magnets for cavalry figures as they are much heavier.  While the magnets hold the figures well, they are not as secure as glued figures.  Nonetheless it makes moving figures so much easier.

Having solved the movement problem I found that taking them in and out of my display cabinet was a bit of a chore, but I like having them on display.  So, another solution was required, and again the answer was an old favourite, movement trays!


These trays were custom ordered from Warbases with a shallow lip around the edge to keep the figures in place, as modelled here by the Hohenzollern Dragoons.


There is no lip at the back, which makes it easy to slide the figures on and off the tray, here modelled by the Hessian Erbprinz Infantry Regiment.


These trays have made it so much easier to get my armies on, and off the table.  the only fly in the ointment was one regiment that didn't quite fit on the trays.  On investigation it seems that my first trial based unit had had the Milliput applied a little more generously such that it slightly overhung the sides of the Litko base. This made them all a tiny bit wider so they wouldn't fit as planned between the tray lips.  So, having finally decided to do something about I shaved the bases down a bit with a Stanley knife and then re-painted the base where they'd been shaved back, and then varnished them.  

And, these are the figures who are currently occupying my painting desk while drying.  How can it take that long to dry you ask?  It's enamel varnish and applied fairly thickly for robustness.


CHARGE the Rearguard

[Pre-Cabinette Archives c.2009!  Hence the poor photos.]

Following my last, bang up-to-fate, post based on a classic Table-top Teaser by CS Grant I thought I'd post a rather dated one of mine own.

This was my first attempt at a Table-top Teaser for my ‘toy soldier’ armies using Brigadier Young’s CHARGE rules.  Not being blessed with a 9x7 foot table like Charles Grant I needed something that would draw out the action or it would all be over in few turns.  To achieve this, I went a bit overboard, with the ‘armies’, separated by a river and entering over several turns; all in a rearguard scenario where one side would be seeking flight rather than fight.  This was crammed on to my 8x5 foot table as shown below with the game in progress a few turns in.


The Scenario: revolves around an Austrian force seeking to evade a much larger, off-table, French force which is attempting to pin them against the river while a smaller Bavarian force tries to block their escape.  The Austrians enter the table at point A (see map) and must exit at point D by move 15; anything failing to do so is deemed captured by the pursuing French.  The Austrians start with a light infantry regiment of 2 coy.s of Pandours holding the house and wood on the northern side of the western bridge and a company of Croats on the road 12” from point A.  


The rest of the Austrians enter one unit per turn along the road at point A; which unit arrives being determined by a D6 as follows:

               1 = Hussar sqn.
               2 = Cuirassier regt.
               3 = Hungarian Inf. regt.
               4 = Austrian Inf. regt.
               5 = Artillery battery #1
               6 = Artillery battery #2

Unit arrival is diced for at the start of the turn, after order writing, and the unit will march on in column along the road.  If the entry roll indicates a unit that is already on the table, the unit with the lowest arrival score that has yet to arrive is substituted.  This mechanism should ensure that the lower numbered units arrive sooner.

The Bavarians mostly enter at Point B with some appearing at C or D; they dice for order of arrival in the same way (entry point in parentheses) as follows:

               1 = Hussar sqn. (C)
               2 = Militia regt. (D)
               3 = Dragoon regt. (B)
               4 = Bavarian Inf. regt. (B)
               5 = Swiss Inf. regt. (B)
               6 = Artillery battery #1 (B)

Before the game begins the Bavarian player rolls a D6 for each river section to determine which are fordable (4-6 on a D6).  A sketch is drawn to record the results but is not shown to his opponent; the ticks and crosses on the map indicate which sections were fordable in the game as played and described below.


The Game: opened with few surprises; the Austrian hussars being the first to arrive to lead the army to safety while the Pandours pushed forward in skirmish order towards point B to delay the approaching Bavarian infantry.  


The action developed rapidly over the next few moves as, spotting Bavarian militia approaching from the east (point D), ...


... the Austrians sent their hussars and Croats to seize the eastern bridge while still clear.  The hussars overthrew the first militia company (see photo) their success underlining the value of cavalry and the frustrating absence of the Austrian cuirassiers.  


While the hussars crashed into the militia across the bridge the arrival of the Bavarian hussars (at point C) convinced the Pandours that discretion was the better part of valour and they fell back to more defensible terrain covering the western bridge.  


As more troops poured onto the table the Pandours effectively shielded their army’s flank as it marched at best speed to the eastern bridge.  


The Pandours were reinforced by a company of Hungarian infantry to prevent any attempt to rush the bridge by the growing number of Bavarian units marshalled against them, while in the backround the rest of the Austrians can be seen making haste to reach the other bridge and safety.  


The Bavarian superior numbers were brought to bear and the Pandours, and to a greater extent the more exposed Hungarians, started to take heavy losses from both musketry and artillery.

Finally, the much-anticipated Austrian cuirassiers arrived bringing up the rear of the column!  The lackadaisical attitude of this unit of dawdlers continued as they marched along the road unconcerned by the sight of two squadrons of Bavarian dragoons eyeing them from the ridge across the river (north of point A).  The cuirassiers’ composure was rudely shattered as the dragoons declared a charge on them – the possibility that the river might be fordable had been overlooked!  


Somewhat unfairly these haughty cavaliers did not pay the price for their hubris, a scandalous sequence of lucky die rolls seeing them win the resulting melee.  It now dawned on the Austrians that the river was not the reliable barrier they had assumed it to be and henceforth more caution was exercised.

As the casualties mounted in the firefight at the western bridge, the Austrian column reached the eastern bridge, now cleared of the militia by the hussars and Croats.  On crossing, the Austrian infantry wheeled to their left to form a defensive line to shield the following units (see photo).  This line was soon put under pressure as the Bavarians shifted their weight of effort from the western bridge to the eastern crossing.  


Initially the infantry firefight was fairly ineffective and all seemed to be going well for the Austrians but then the Bavarian artillery evened things up with several turns of devastating fire.  No doubt this was Lady Luck offsetting the outrageous luck enjoyed by the Austrian cuirassiers in their earlier fracas with the dragoons.  With the Austrian artillery mostly staying limbered to keep pace with the Austrian column were unable to reply effectively.  As a result, the balance of the game started to shift until in the twelfth move both armies reached their break points!  The Bavarians claimed a draw with honours even, while the Austrian argued for a technical victory, as with the Bavarians withdrawing the Austrian line of retreat was left open…   With such an unsatisfactory outcome, further conflict is inevitable, perhaps you can achieve a more decisive result?
Austrian Advance Guard Wins Again... 

...but this time I was Austrian.   :o)

Simon arrived this morning, and given the choice, opted for the Bavarians, so this time I would be Austrian.  The rules were a modified / simplified version of Brigadier Peter Young's 'Charge!'.

The first thing we did was to number our units as we would want them from left to right before rearranging them that way.  This pre-game tweak was to allow us to shuffle our units around, within the same constrained deployment area, if we weren't happy with how I had plonked them down when setting up the table.

We both made some changes, first my Austrians, from [their] left to right: the Hungarian Andrássy Infantry Regiment (IR); the Batthyányi Dragoon Regiment (DR); the Los Rios IR; a Field Artillery battery; the Arberg IR; the Baranyáy Hussar Regiment (HR); and, the Karlstadt Pandurs (Croats).  Out in front is Khevenhüller and his staff.


Now, the Bavarians from [their] right to leftthe Frangipani HR (yes that's a real regiment); a Field Artillery battery; The Pfalz Zweibrücken IR; the Max Josef IR; the Swiss Diesbach von Signau IR; the Hohenzollern DR; and, the von der Kurz Frei Korps.  And, these were all being led into the field by von Seckendorff and his coterie of staff officers.


Turn 1: and we got down to the serious business of writing orders for all our units.  Every unit starts the game with an order but in future turns the commanders can only write as many new orders per turn as they have ADCs.  Therefore, orders should be specific about whether it's just for the current move, or to be followed until a new order arrives.  Both sides' move, shoot and mêlée simultaneously.

My plan was to occupy my objective, the town of Ytterberg, and stand on the defensive until it was clear what reinforcements would arrive in Turn 5.  This got underway with the Andrássy IR stepping off into column to wend its way into Ytterberg to occupy the buildings along the far side; this was why I had repositioned them to be on the left of my line.  My guns moved forward to form a battery behind the hedge with my infantry ordered to form line either side of them. Both cavalry units were ordered to make a half a move to echelon out towards either flank and stop, and the Croats made a beeline for the woods.


The Bavarians formed the infantry in their infantry into line, and advanced their battery to the edge of the high ground with the hussars doing the same, only further out to their right.  Their left wing, the Diesbach IR, Hohenzollern DR and the Frei Korps, was thrust forward towards the wood and their objective, the bridge.

This ended the turn as with the artillery having moved there was no firing.

Turn 2: after writing new orders, kicked off with charge declarations, and both my cavalry units were ordered to charge the cavalry to their front.  My Baranyáy hussars were counter-charged by the Hohenzollern dragoons and, as light cavalry, would be facing an uphill struggle against their heavier opponents.  On the other wing, my dragoons got nowhere near the Bavarian hussars, which I had assumed would be advancing, but the rotters stayed put on the hill leaving my charge to come up short in front of their artillery battery!  Luckily, Simon's dice let him down and he only inflicted one hit.


While this was going on, my infantry were still moving into position and the first of my guns managed to get a shot off to negligible effect (guns can move up to 6" and fire but have only an even's chance of doing so).  On the other side, the Bavarian infantry had finally shaken themselves out into line and continued to advance.  


As can be seen from the photo above the mêlée between the Baranyáy HR and Hohenzollern DR has been resolved; so let's zoom in on that...


...and to my delight the hussars have managed to overcome the odds to hold the dragoons to 4-4 draw.  Drawn cavalry mêlées have a 50:50 chance of continuing for a second turn so, a d6 was rolled, and the combat was destined to continue next turn.  Would I be lucky again?

Turn 3: I ordered my dragoons to charge again, and this time the yellow Frangipani hussars, not wanting to receive the charge at the halt, counter-charged.  On the far side of the battlefield, the von Der Kurtz Frei Korps were picking their way through the battlefield detritus and approaching their objective, the bridge (also in this turn my Andrassy IR had taken occupied the buildings in the Ytterberg).


In the centre the Bavarian's Pfalz infantry continued to advance and started to take some casualties from my artillery (I forget how many).


You might've noticed in the background of the previous photo, the cavalry mêlée continued from last turn has taken a vicious turn; as can be seen below:


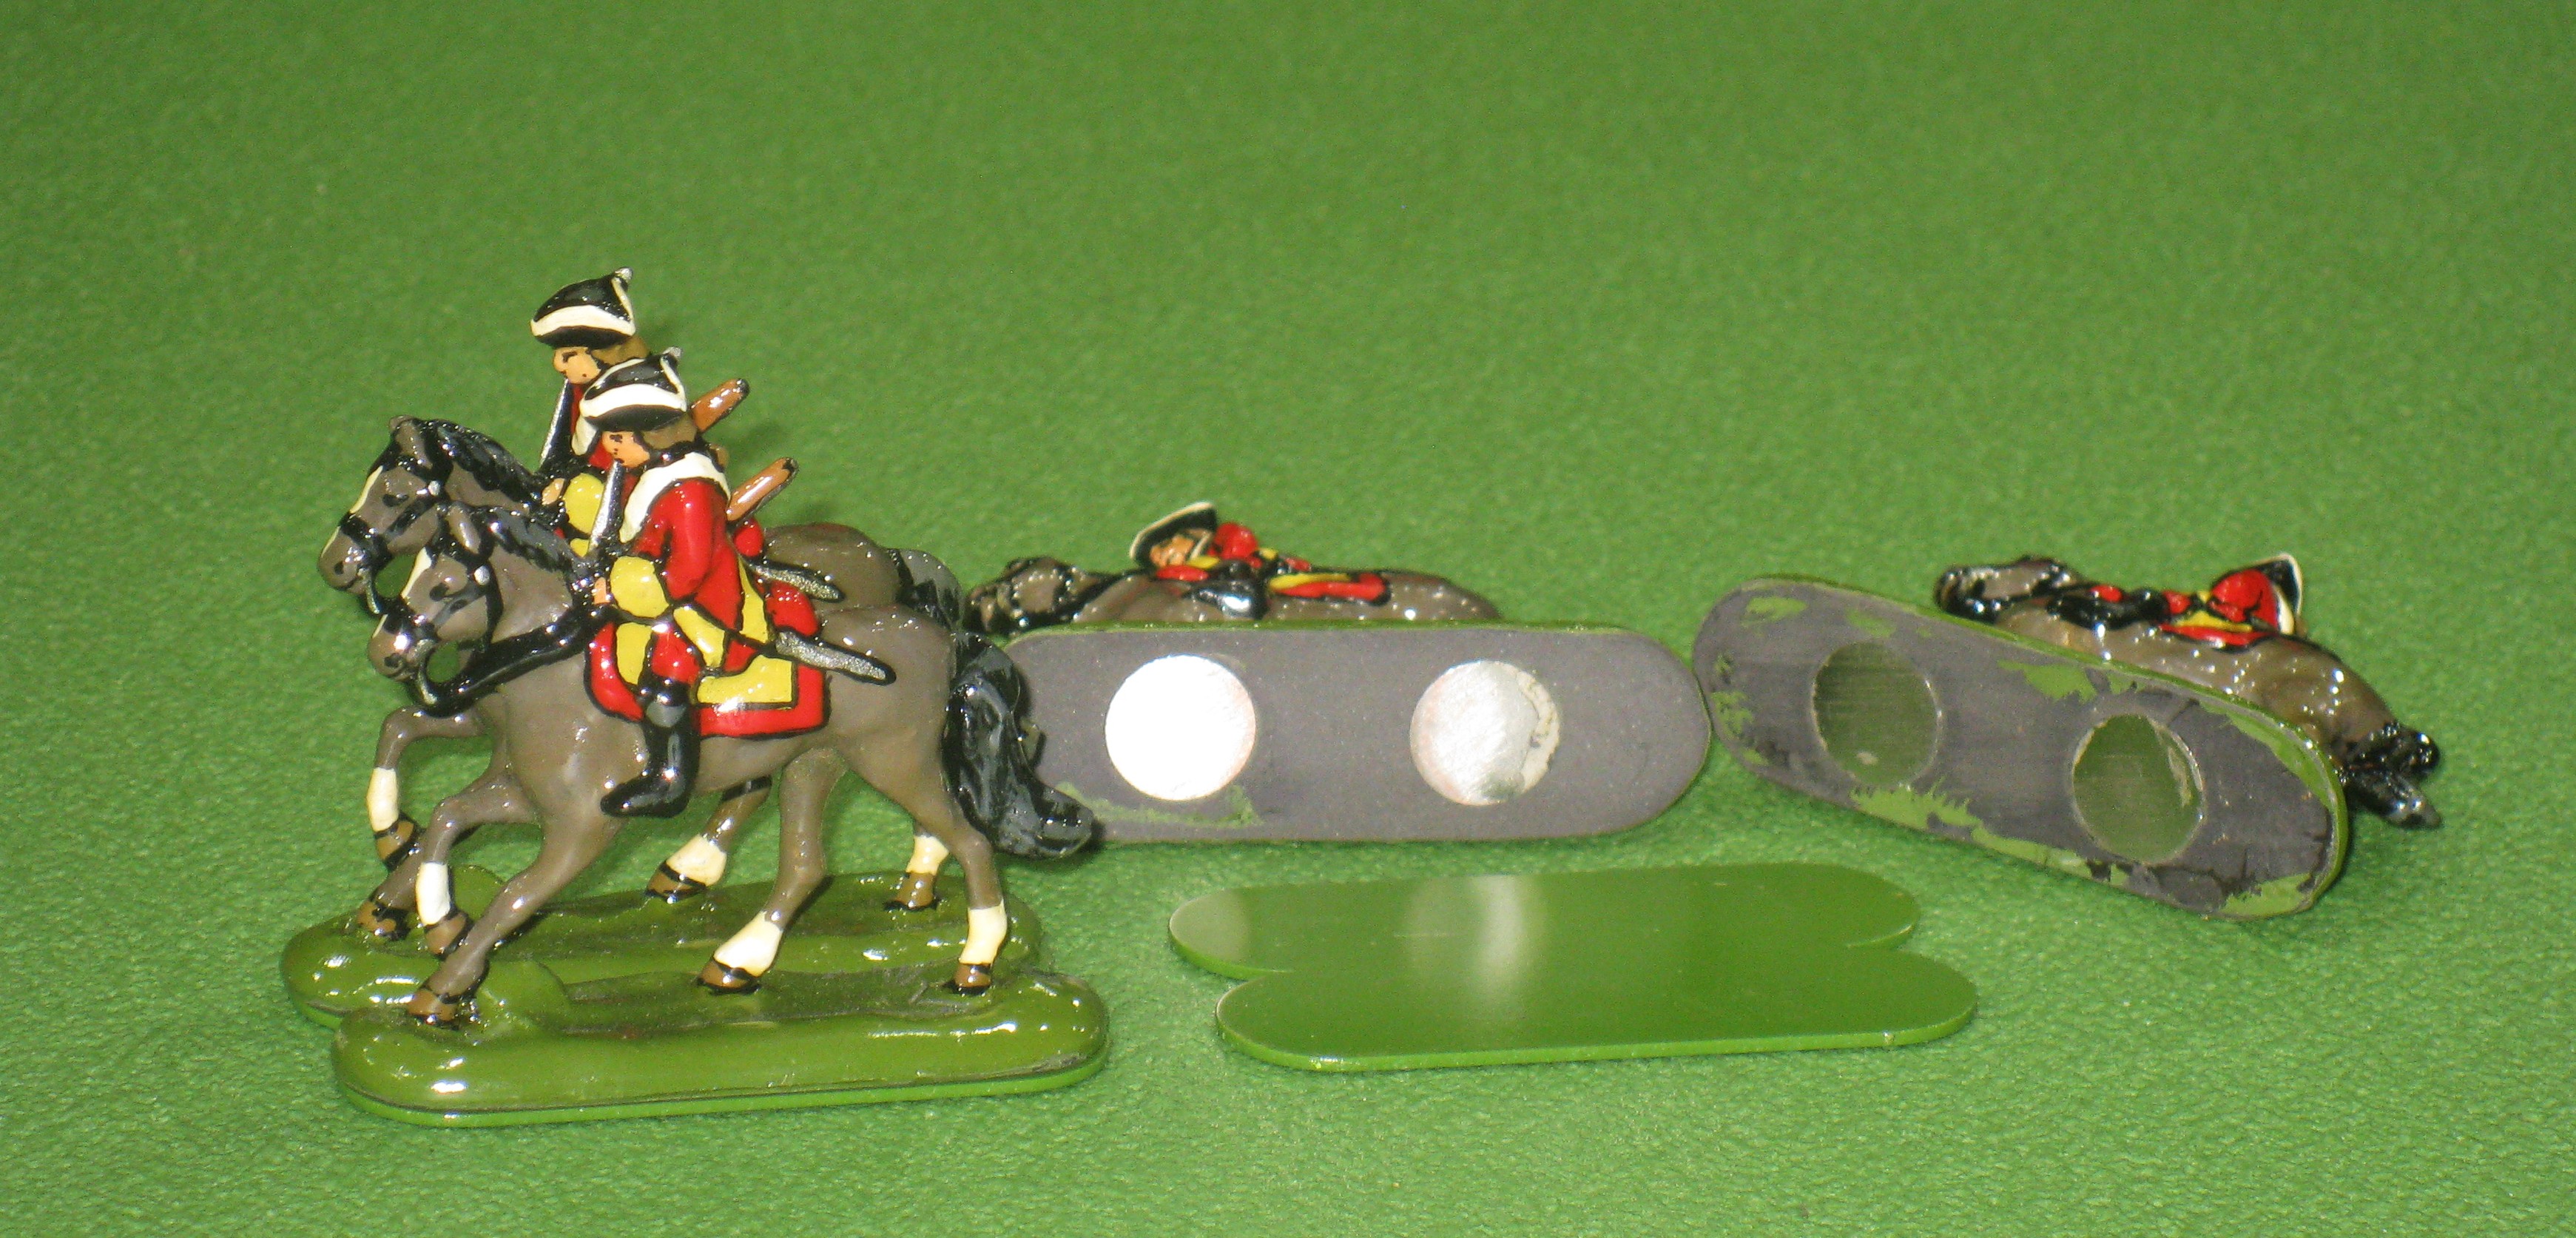
This time the Bavarian dragoons got their act together to trounce the lighter hussars 7-1!  And, to rub it in took two prisoners (the figures placed behind the dragoons).  This was the end of the gallant (foolhardy?) hussars as they would have to rally-back for three turns, one for each turn of combat 
plus one more turn for being beaten.  This would, in a few moves time, see them moving off the table edge never to return.  First blood to the Bavarians.

This ill-advised matching of light cavalry against their heavier brethren was always likely to end badly, as was so ably demonstrated in the other mêlée in this turn by the Batthyányi dragoons who rolled over the Frangipani hussars; winning 6-1 and also taking two prisoners.


This time, after only one round of combat, the hussars would just manage to avoid leaving the table before completing their rallying-back in two moves time.

Turn 4: with the cavalry on both sides rallying after their combats, was largely an infantry and artillery affair.  This saw the Croats sneak out from the woods to snipe at the victorious Bavarian dragoons as they rallied forward (in place).  Nearby, the Bavarian advance, in the shape of the Pfalz Zweibrücken IR, finally came within close range of my artillery.


So, uttering that classic wargaming phrase, "anything but a one" to hit, I rolled the dice, and...


In contrast, the Bavarian artillery, despite the longer range, did much better ranging in on my dragoons as they rallied-back[1].


Turn 5: and it was time for both sides to draw one of the eight envelopes detailing what reinforcements would arrive on the table during normal movement in this turn.  Again, Simon's luck deserted him (sadly a consistent theme in this game) and while he drew a dragoon regiment (the Saxon Prinz Karl DR) ...


... I drew a cavalry brigade comprising the Birkenfeld Kürassier Regiment (KR) and a composite regiment of Batthyányi and (Hessian) Lillenbracht dragoons.  In the background the remnants of the Baranyáy HR can be seen just about to leave the table as the reinforcements arrived.


After that, things just went from bad to worse for the Bavarians as my battery made up for its previous failings and started to wreak havoc upon the Zweibrücken IR.

Then, the Max Josef IR panicked when charged, by the now rallied Batthyányi DR, and fired too soon (at long range) so only managed to shoot down two dragoons as they charged in.  At this stage all was not lost as a 2-deep line is on an equal footing in mêlée against charging cavalry.  But, with a certain inevitability, my little men beat the odds to win the mêlée 4-2, which, when the shooting casualties were added became 4-4, another draw!   


Cavalry have the option choose whether to fight a second turn of mêlée against infantry, and having reduced part of his line down to just 1-deep (i.e. 'broken in'), I did so.

Turn 6: the mêlée continued from the last turn, saw the Batthyányi dragoons win comfortably, 4-2 with 1 prisoner taken, which effectively knocked the Max Josef IR out of the fight for the next three turns.


In the centre th,e Bavarian gloom deepened as the Austrian artillery, scoring a near maximum, cut the Zweibrücken IR down below half-strength; meaning they were finished as an effective unit and would have to retreat for two full turns, and after that would not be able to advance further.


And, in the background of the above, can be seen the final nail in the Bavarian coffin, a desperate charge by the Bavarian Hohenzollern DR, hoping to repeat the success of the Austrian Batthyányi DR.  However, here, the Austrian Arberg IR held its nerve, and delivered a shattering, point-blank volley into the face of the charging dragoons, scything down eight before they could close.  With the odds in mêlée being equal, there was no way back for the dragoons who went down 9-0 and lost a further two men taken prisoner - this meant they were also now ineffective like the Zweibrücken IR. 

At this point... 

...reduced to one effective infantry regiment against three (two of which were intact); and, one dragoon regiment and a battered hussar regiment against intact kürassier and dragoon regiments plus a battered dragoon regiment, the writing was on the wall and von Seckendorff wisely conceded and withdrew from the field.

On balance, apart from the lucky breaks all going my way, I think the plan to stay on the defensive until the reinforcement situation was clear was the right tactic.  Charge! can be very bloody which makes attacking hard unless you have a clear advantage.  Obviously, I benefitted from having played this scenario before.


Notes:

[1.] Troops that are victorious in mêlée have the option of rallying-forward (in place) or rallying-back up to a full move (full move rally-backs are compulsory for defeated troops).